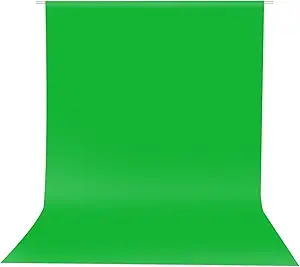
Green Screen
Set up a green screen for versatile backgrounds and professional effects.
Buy OnKey Tips for Creating an Effective Streaming Studio Environment
Top 10 Tips for Setting Up Your Streaming Studio: Your Ultimate Guide to a Pro Setup Read more →
Set up a green screen for versatile backgrounds and professional effects.
Buy On
Choose reliable streaming software for managing your broadcasts smoothly.
Buy On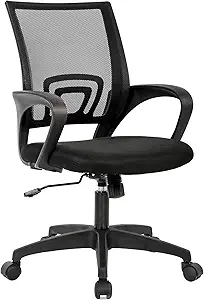
Use a comfortable chair to support long hours of streaming without fatigue.
Buy On
Ensure a strong and stable internet connection to avoid disruptions during streams.
Buy On
Create engaging overlays and graphics to enhance your streaming visuals.
Buy On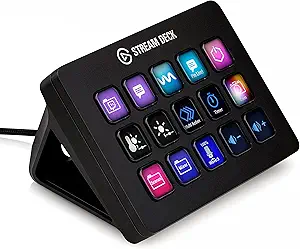
Use a streaming deck for easy access to controls and hotkeys during broadcasts.
Buy On
Have backup equipment available to prevent interruptions in case of failures.
Buy On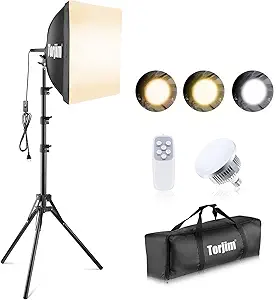
Ensure proper lighting with softboxes or ring lights for a professional look.
Buy On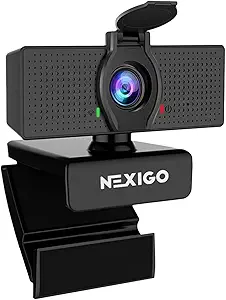
Use a high-resolution webcam to enhance video quality for your streams.
Buy On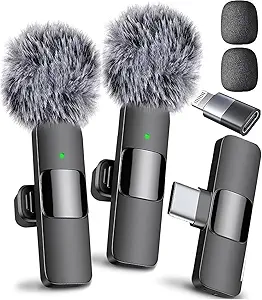
Invest in a quality microphone to capture clear audio during broadcasts.
Buy OnIn the dynamic world of content creation and online broadcasting, having a dedicated streaming studio is more than just a luxury—it’s a necessity. Whether you're a gamer, a podcaster, a vlogger, or a business professional hosting webinars, the right streaming setup can drastically elevate the quality of your content and increase your audience engagement.
But let’s be honest—setting up a streaming studio can feel overwhelming. There are countless components to consider: lighting, cameras, microphones, software, and more. To help you build a space that supports high-quality production, this guide walks you through the Top 10 Tips for Setting Up Your Streaming Studio, complete with essential gear and practical advice.
Lighting can make or break your stream’s visual appeal. Even with the best camera, poor lighting can cause grainy, dull, or shadowy footage. That’s why good lighting is the first step toward a pro-looking setup.
Key Light: Your main light source. Consider soft LED panels or ring lights.
Fill Light: Reduces shadows and balances the main light.
Back Light: Separates you from the background and adds depth.
Brands like Elgato Key Light, Neewer Ring Lights, and Godox LED panels offer quality lighting for streamers of all levels. Also, adjust your color temperature to match the vibe—cool light for techy streams, warm light for cozy vibes.
Pro Tip: Always place your key light at a 45° angle to your face for the most flattering look.
#lighting #streaming #tech #setup
If your viewers can’t see you clearly, you lose a critical part of the human connection that drives engagement. A high-quality webcam ensures you appear crisp, professional, and polished.
1080p or 4K resolution
High frame rate (60fps preferred)
Autofocus and light correction
Plug-and-play USB compatibility
Top models include the Logitech Brio 4K, Razer Kiyo Pro, and Elgato Facecam. If you're aiming for DSLR-level quality without the DSLR price tag, these webcams are your best bet.
#webcam #videoquality #streaming #tech
Audio is just as important—if not more so—than visuals. A professional-grade microphone ensures your voice is clear, warm, and free of background noise, giving your stream a polished, high-end sound.
USB Microphones: Easy to use, plug-and-play (e.g., Blue Yeti, Elgato Wave:3)
XLR Microphones: Better quality, requires audio interface (e.g., Shure SM7B)
If you’re serious about streaming long-term, go with an XLR mic setup for studio-level quality. Don’t forget accessories like pop filters, shock mounts, and boom arms.
#microphone #audio #streaming #tech
If you want to transform your background or immerse yourself in a game or scene, a green screen is essential. It allows you to remove or replace your background using chroma key effects in your streaming software.
Collapsible screens for small spaces
Wall-mounted fabric for permanent setups
Pop-up panels for portability
Pair your green screen with even lighting to avoid shadows and achieve clean chroma key cuts. This creates a visually dynamic stream without distracting clutter in your background.
#greenscreen #effects #streaming #setup
Your streaming software is your control center—it manages your overlays, camera, audio sources, scenes, and broadcasts to platforms like Twitch, YouTube, or Facebook.
OBS Studio (Free, open-source, highly customizable)
Streamlabs OBS (User-friendly with built-in widgets)
XSplit Broadcaster (Great for Windows users)
vMix or Ecamm Live (Advanced options for professionals)
Choose software based on your comfort level and desired features. Add plug-ins, transitions, and filters to customize your stream and create an engaging experience for your audience.
#streamingsoftware #broadcasting #streaming #tech
Long streaming sessions demand comfort and ergonomics. An uncomfortable chair can cause back pain, fatigue, and even affect your performance or mood during a live session.
Adjustable lumbar and neck support
Breathable mesh or PU leather materials
Reclining and height adjustment
Good cushioning for extended use
Chairs from Secretlab, Herman Miller, and DXRacer are favorites among streamers. A quality chair isn’t just a luxury—it’s a productivity booster and health essential.
#chair #comfort #setup #streaming
A solid internet connection is non-negotiable. Laggy streams, dropped frames, or audio/video sync issues will drive viewers away faster than anything else.
Upload speed: 6 Mbps for 1080p at 60fps, 10 Mbps+ for higher resolution
Wired Ethernet is more stable than Wi-Fi
Use network prioritization (QoS) to keep streaming traffic first in line
Consider having a dedicated streaming router or using fiber internet if available. Always test your speeds before going live using tools like Speedtest.net.
#internet #streaming #setup #tech
Your stream should not only sound and look good—it should also feel branded and interactive. That's where overlays and graphics come in. They enhance viewer engagement and make your stream stand out from the crowd.
Alerts for followers, subs, donations
Stream starting/ending screens
Scene transitions
Nameplates, chat boxes, and webcam frames
Sites like Nerd or Die, OWN3D, and Streamlabs offer both free and premium overlay packages. These elements add a professional polish to your stream and reflect your unique personality or brand.
#overlays #graphics #streaming #broadcasting
Imagine switching scenes, launching music, triggering sound effects, and sending chat messages—all with a press of a button. That’s what a streaming deck allows you to do. It’s the ultimate tool for smooth, dynamic live production.
Elgato Stream Deck (most popular)
Loupedeck Live
Touch Portal (software alternative)
A stream deck enhances your workflow and creates a professional broadcast experience. Customize each button with icons and functions—ideal for multitasking and improving production flow.
#streamingdeck #streaming #tech #setup
Even with the best setup, technical issues can strike at any time. Power outages, hardware malfunctions, or network hiccups can disrupt your stream unless you’re prepared.
Spare webcam or mic
Extra cables and batteries
Secondary internet source (e.g., mobile hotspot)
Uninterruptible Power Supply (UPS)
Redundancy ensures you're not caught off guard. A backup setup doesn’t need to be expensive—it just needs to be functional in a pinch.
#backup #equipment #streaming #setup
While the top 10 essentials lay the groundwork, here are some pro-level tips to enhance your streaming studio even further:
Add acoustic panels or foam to walls to reduce echo and background noise.
Use Velcro straps or cable trays to keep your workspace tidy and professional.
One screen for your stream/monitoring, another for gameplay, chat, or editing.
RGB lighting strips behind your desk or monitors can add ambiance and brand color.
Always do a full tech check to make sure everything is functioning perfectly.
Logitech C920 Webcam
Blue Snowball USB Mic
Ring Light
OBS Studio
Budget Green Screen
Basic overlays from Streamlabs
Razer Kiyo Pro Webcam
Elgato Wave:3 Mic
Stream Deck Mini
Collapsible Green Screen
Elgato Key Light
Professional overlays
DSLR or Mirrorless Camera (with Cam Link)
Shure SM7B + Audio Interface
Elgato Stream Deck XL
Dual Key Light Setup
Herman Miller Aeron Chair
Custom animated overlays
Building your streaming studio is an exciting journey—and with the right setup, it’s also a smart investment in your content creation career. Whether you’re just starting out or leveling up your game, these Top 10 Tips for Setting Up Your Streaming Studio provide a strong foundation for a professional, engaging, and comfortable streaming environment.
Good Lighting
High-Quality Webcam
Microphone
Green Screen
Streaming Software
Comfortable Chair
Reliable Internet Connection
Overlays and Graphics
Streaming Deck
Backup Equipment
With the right equipment, software, and setup choices, you’ll be well on your way to delivering compelling live content that keeps viewers coming back.
#greenscreen #effects #streaming #streamingsoftware #broadcasting #tech #chair #comfort #setup #internet #overlays #graphics #streamingdeck #backup #equipment #lighting #webcam #videoquality #microphone #audio