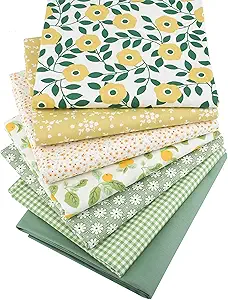
Vintage-Inspired Fabric
Fabrics with retro prints such as florals, polka dots, or paisley to capture a vintage look.
Buy OnDiscover the tools and materials you need to create stunning vintage-inspired sewing projects at home.
🧵 Top 10 Things to Have for a DIY Vintage Sewing Project Read more →
Fabrics with retro prints such as florals, polka dots, or paisley to capture a vintage look.
Buy On
Reproductions of 1940s–1960s sewing patterns for dresses, tops, and skirts.
Buy On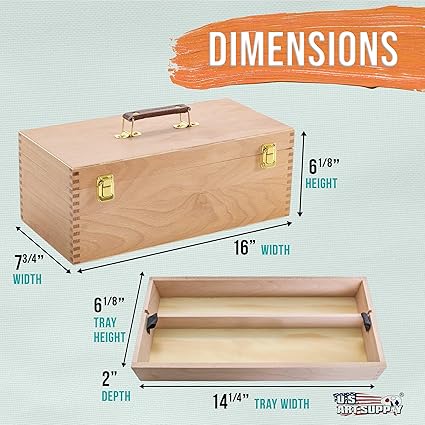
A classic wooden sewing box to organize threads, needles, and accessories.
Buy On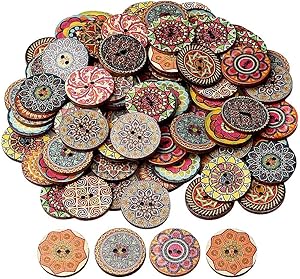
A collection of vintage-style buttons to embellish your creations.
Buy On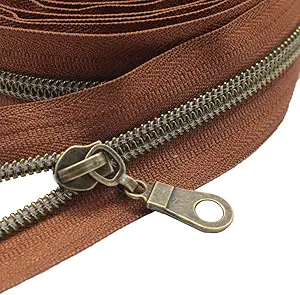
Classic metal zippers that match vintage styles for an authentic finish.
Buy On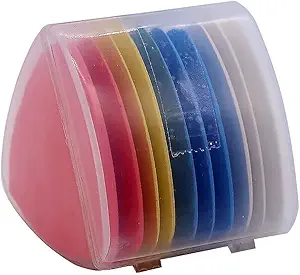
Essential for marking fabric and ensuring precision in your vintage sewing projects.
Buy On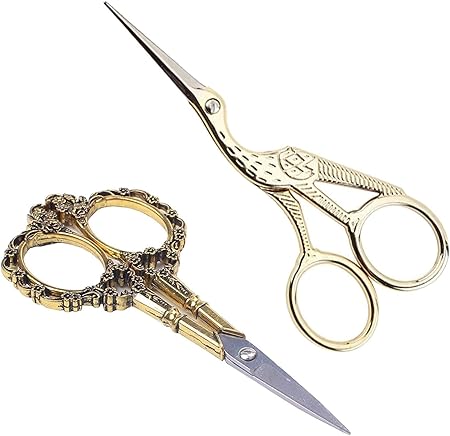
A pair of vintage-style sewing scissors for precise and stylish cutting.
Buy On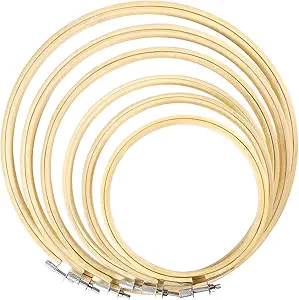
A wooden embroidery hoop for adding delicate vintage-inspired designs to your fabric.
Buy On
Vintage-style lace trims and ribbons to give your projects an authentic retro touch.
Buy On
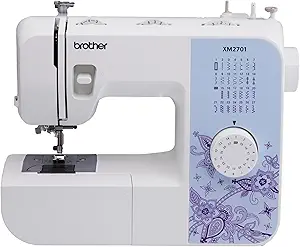
A modern sewing machine that includes retro stitch patterns for an authentic vintage effect.
Buy OnReviving vintage styles through DIY sewing is an empowering creative journey—from finding the right fabric to mastering timeless techniques. Whether you're designing retro dresses, home decor, or keepsakes, these top 10 essentials will set you up for sewing success and inspire a charming, vintage aesthetic.
Fabric sets the tone—vintage florals, polka dots, ticking stripe, or retro geometrics transport your project to another era.
Reproductions of 1940s–70s prints
Naturals: cotton voile, mid‑weight linen, sateen
Width 44–60″ for garment/curtain versatility
Pre-wash fabric to avoid shrinkage
Mix scale: bold print for main piece, small print accents
Color palette: pastels or muted shades for authenticity
Fabric care: starching for crisp seams
Best vintage shops & manufacturers
Choosing eco-friendly vintage vs new vintage-look
Original-era patterns ensure authentic vintage silhouettes, fit, and drape.
Reissued designs from 1930s–70s
Include bodice, sleeves, collars for garments; tea towel, cushion for home crafts
Trace pattern instead of cutting originals
Choose enveloped or PDF based on scale & preference
How to grade vintage patterns for modern sizing
Pattern hacking for modern silhouettes
Reprint quality review: Simplicity vs Vintage Vogue
A dedicated vintage-style sewing box routes tools, adds nostalgic charm, and enhances workspace organization.
Tiered compartments with trays
Hardwood or bamboo, accompanied by felt base
Ruled drawers for reels and trims
Line compartments with felt to protect precious pins
Attach magnet strips into lids for metal tool storage
DIY wooden box makeover (chalk-paint, new knobs)
How to organize by project phase—cutting, construction, embellishment
Tiered box alternatives for modern users
Vintage buttons—glass, bakelite, mother-of-pearl—turn simple seams into focal statements.
Mixed packs with 10–30 buttons varying in size, shape, and finish
Faceted colors, carved edges, metallic trims
Lay out your design on a mockup before stitching
Use real shell for closures, plastic for weight control
Secure with narrow looped thread for appliqué buttons
Rescuing buttons from thrift finds
DIY: shellac or trim for matte-to-gloss finish updates
Trendwatch: color-coordinating button mixes
Metal coil or brass teeth zippers add durability and that vintage industrial touch to garments.
Open-end or centered zippers in brass, copper, antique silver
Yard-long coil zips for cushion covers or skirts
Basis: use appropriate weight foot and small stitch length
For style: expose zipper head with decorative inclusion
Clean and polish teeth with soft brass brush
Replacing vintage plastic zips with metal alternatives
Invisible vs exposed: why choose metal
Metal zipper specialty threading tips
Chalk marks help you precision mark seams, alterations, button placements—especially on vintage-style fabrics.
Triangular white or chalk wheel
Color-matching fabric chalk for dark prints
Test on scrap piece to ensure removability
Dust off lines after pressing—not water rinse
Keep it sharp for crisp lines
DIY: charcoal‑stick substitute
Chalk vs water-soluble pens for quilting
Tricks for making disappearing chalk lines
Old dressmaker shears can be heirloom sharp—offering safer, cleaner cuts and aesthetic charm.
Oversized spring return style, roughly 8–10″
Solid metal blades with ergonomic handles
Oil joint lightly, sharpen annually with whetstone
Use cloth for pressing to protect blade sheen
Sharpening ancient scissors yourself
How-to: identifying and appraising vintage shear brands
Care: storing with scissor guard
An embroidery hoop holds fabric taut for handwork and doubles as display—think hoop ornaments or framed stitches.
Wood 6–10″ hoops with brass thumb screw
Store small decorate‑ready hoops for finishing
Tighten until fabric slowly rotates
Choose hoop size matching motif
Finish by stretching over cardboard with trim edge
DIY: make fabric wall art in hoop
Stitch styles—chain, stem, satin for vintage look
Framing and tension preservation techniques
Adding lace trims, ribbons, and ric-rac gives garments that handmade vintage flair with finesse.
1/2–2″ wide crocheted or scalloped lace trims
Ribbons: satin, grosgrain, velvet in soft 1940s–60s hues
Mark placement with chalk; baste before top stitch
Use matching needles to avoid snag
Press trims with cloth to protect sheen
DIY trim-dye workshop
Styling trims: adding lace to collar cuff or pocket
Mixing lace types—crochet + bobbin lace combo ideas
A machine with heirloom stitch options—like scallops, arrows, braids—improves hobby sewing with retro flair.
Modern machine with decorative stitches or refurbished vintage on Janome/Singer
Buttonhole plate and embroidery foot included
Test stitch length and tension on scraps
Thread in full spool for consistent stitching
Digitally practice stitch combinations on mock
How to retrofit modern models with vintage-stitch cams
Stitch tutorials: lightning, pearl‐round, mr.’s cliché stitches
Stitch pattern placement on sewn garments
Choose fabric & trims
Select pattern and plan design placement
Use tailor’s chalk to mark pieces
Cut with antique scissors, engrain quality
Baste trims, install zippers/buttons
Stitch with vintage‑inspired stitches
Add embroidery or hem finishes
Press and finalize sewing-piece packaging in box
Hand-laundry vintage fabrics when possible
Modern preshrink before sewing
Oil machine after each project
Store vintage garments with acid-free tissue paper
DIY tutorials: lingerie set, cushion, vintage dress
Resource guides: links to vintage-lace suppliers
Designer interviews: modern dressmaker using vintage tools
Visual galleries: before/after trimming pictures
Downloadable planners: project checklist
Safety tips: proper sharp-object storage
| # | Essential | Why It Matters and Usage |
|---|---|---|
| 1 | Vintage‑Inspired Fabric | Sets tone & era for project, foundation of style |
| 2 | Sewing Pattern Reprints | Ensures vintage silhouette & proper construction |
| 3 | Wooden Sewing Box | Organize big collection & workspace aesthetics |
| 4 | Retro Button Assortment | Adds special flair and detail to seams |
| 5 | Metal Zippers | Durable closures with vintage steel/metal edge |
| 6 | Tailor’s Chalk | Precision color-marking and accuracy before stitching |
| 7 | Antique Scissors | Clean cuts, smoother sewing, heirloom quality |
| 8 | Embroidery Hoop | Hand-sewing embellishments stare crisp and spread charm |
| 9 | Lace Trim & Ribbons | Adds feminine embellishment with visual impact |
| 10 | Sewing Machine w/ Vintage Stitches | Decorative yet functional, completes look professionally |
#vintagefabric #retroprints #DIYsewing #sewingpatterns #vintageprojects #DIYfashion #sewingbox #vintagetools #retrocrafts #vintagebuttons #sewingdetails #DIYembellishments #metalzippers #retrofinishes #vintagesewing #tailorschalk #sewingessentials #vintagedetails #vintagescissors #sewingtools #DIYcrafting #embroideryhoop #retrodecorations #DIYembroidery #lacesewing #vintageembellishments #DIYtouches #sewingmachine #vintagestitching #retrocreations