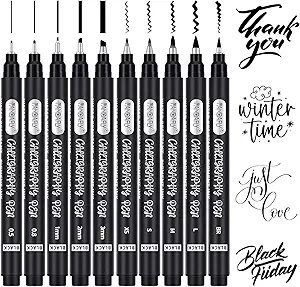
Calligraphy Pens
Bring your own calligraphy pens for better control.
Buy OnKey items and tips to enhance your calligraphy experience
Title: Things to Remember for a Calligraphy Class: The Ultimate Guide to Brush Up Your Artistic Writing Read more →
Bring your own calligraphy pens for better control.
Buy On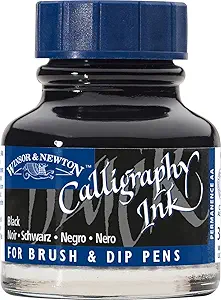
High-quality ink is essential for smooth writing.
Buy On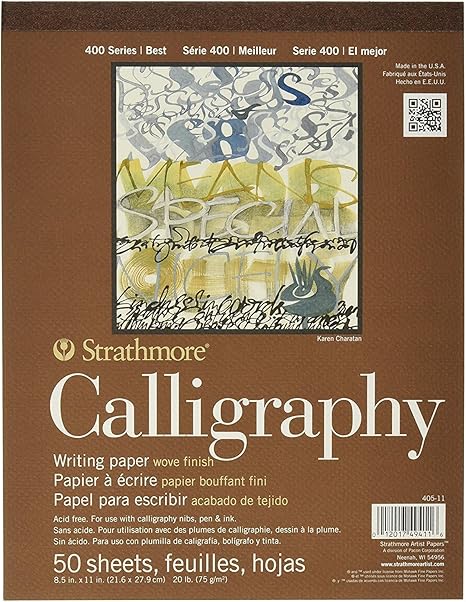
Use thick paper to prevent ink bleeding through.
Buy On
A comfortable workspace is crucial for focus.
Buy On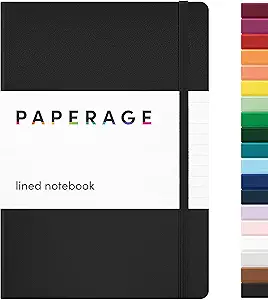
Bring a practice notebook for trial runs and techniques.
Buy On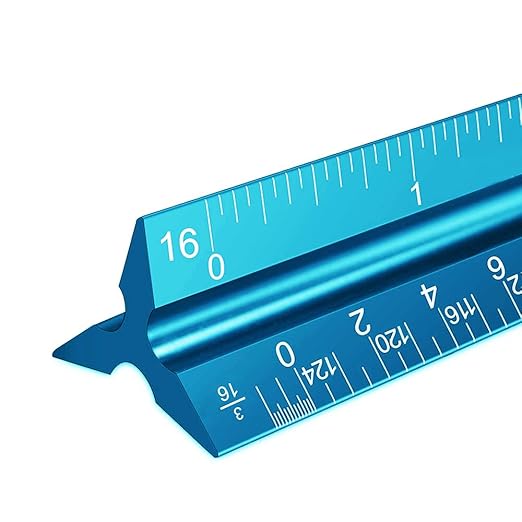
Bring a ruler for drawing straight lines and guides.
Buy On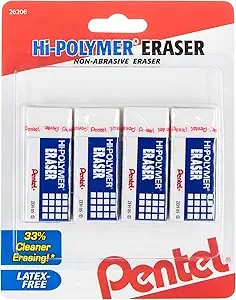
An eraser for correcting mistakes on practice sheets.
Buy On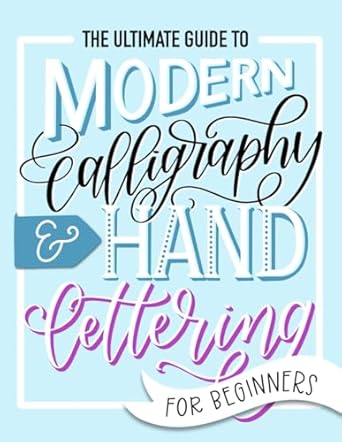
Reference materials for styles and techniques.
Buy On
Inspiration images to spark creativity during practice.
Buy On
A positive attitude to enjoy learning new skills.
Buy OnTitle: Things to Remember for a Calligraphy Class: The Ultimate Guide to Brush Up Your Artistic Writing
Whether you’re a seasoned lettering enthusiast or just dipping your toes into the world of graceful penmanship, preparing for your first (or even fifth) calligraphy class can make all the difference. A well-organized setup and the right tools can elevate your learning experience, letting creativity flow uninterrupted. This blog post dives into everything you need to remember before stepping into your calligraphy class. From tools of the trade to a positive mindset, we’ve covered all the essentials.
Calligraphy is more than just fancy handwriting—it's a form of art that demands focus, the right tools, and a dedication to practice. The journey can be calming and meditative, but a forgotten pen or poor-quality paper can turn your peaceful session into a frustrating one.
#pens #calligraphy #tools
A good pen is your best friend in calligraphy. Depending on your style (modern, traditional, brush lettering, etc.), the pen you choose can vary:
Dip Pens: Perfect for traditional calligraphy. They consist of a nib and a handle.
Brush Pens: Great for modern calligraphy and beginners.
Fountain Pens with Calligraphy Nibs: Ideal for a cleaner, easier writing experience.
Marker-Based Pens: Used in faux calligraphy and often seen in bullet journaling.
It’s a smart idea to bring a couple of types to experiment with in class.
Pro Tip: Make sure the nibs are clean and functioning properly before class to avoid ink blotches.
#ink #supplies
Not all ink is created equal. High-quality ink flows evenly, dries quickly, and offers rich pigmentation. Waterproof inks are great for final projects, while non-waterproof varieties are perfect for practice.
Consider these ink types:
India Ink (bold and black)
Colored Inks (for creative flair)
Metallic Inks (for decorative pieces)
Caution: Always test your ink and nib combo at home first to ensure compatibility.
#paper #writing #supplies
Using thick, smooth paper is essential. Thin or fibrous paper can bleed and feather, making your hard work look sloppy. Ideally, look for:
90gsm or heavier
Smooth surface (Bristol or Rhodia pads are great options)
Acid-free, archival-quality paper for longevity
If your class provides paper, still bring your own for extra practice or notes.
#workspace #comfort
Your body posture plays a crucial role in your lettering technique. An ideal workspace setup includes:
A flat, stable table
An ergonomic chair
Good lighting (preferably daylight or white LED)
Minimal distractions
Bring a desk cushion or lumbar support if you’ll be seated for long periods.
#notebook #practice #learning
Having a dedicated notebook for practice helps you track your growth. Choose one with:
Dotted or grid paper for consistent letter sizing
Smooth texture to prevent pen snags
Sections for different styles or techniques
Many calligraphers use practice notebooks to jot down ideas or create alphabets they can reference later.
#ruler #tools
Your ruler will be your guide—literally. Guidelines are essential for letter height, spacing, and alignment. A clear ruler with both inch and centimeter markings is ideal.
Optional but helpful:
T-square ruler
Triangle scale ruler for slanted guides
Use a pencil to draw light guidelines that can be erased later.
#eraser #tools
Mistakes happen, especially when sketching out your compositions. A high-quality eraser can cleanly lift pencil guidelines without damaging the paper.
Look for:
Vinyl erasers (clean removal)
Kneaded erasers (good for subtle lightening)
Mechanical erasers (for precision)
Avoid using rubber erasers that can leave smudges or tear the paper.
#reference #learning #calligraphy
Bring along reference sheets or books for inspiration and technical guidance. These can include:
Alphabet exemplars
Stroke practice sheets
Layout templates
Instructional books (e.g., Modern Calligraphy by Molly Suber Thorpe)
Many calligraphy classes also recommend a specific textbook or reference manual, so check beforehand.
#inspiration #creativity
Having visual references—whether it’s Pinterest boards, Instagram screenshots, or magazine cutouts—can help spark ideas. Inspiration boards also help when working on a personal project during the class.
Some creative prompts you might explore:
Wedding invitation styles
Decorative quote layouts
Seasonal or holiday-themed lettering
Mandalas with calligraphic accents
Keep a folder (physical or digital) handy for quick access during class.
#attitude #learning #creativity
Calligraphy is an art form that rewards patience. You might not master every stroke on day one—and that’s okay. Bring a positive attitude, an open mind, and a willingness to learn.
Encourage yourself to:
Embrace mistakes as learning moments
Compliment your progress
Stay motivated with short-term goals
Many beginners feel overwhelmed by perfectionism—letting go of that can unlock your full creative potential.
If your class includes digital instruction or demonstrations, having a tablet or phone with notes or PDFs can help. Bonus: Record a timelapse of your writing process!
Use a dedicated case or pouch to carry all your calligraphy tools. Keep everything organized, so you're not fumbling during class.
Staying hydrated and energized helps you stay focused. Some sessions run long, and it's important to keep your brain fueled.
Bring tissues, paper towels, or a small cloth for cleaning your nibs and workspace. A tidy station improves your overall experience.
Skipping Guidelines: Even pros use guidelines.
Using the Wrong Paper: Avoid copier or printer paper.
Holding the Pen Incorrectly: Learn correct grip and angle.
Applying Too Much Pressure: Let the pen do the work.
Not Practicing Consistently: Improvement takes time.
When you come prepared with the right tools and mindset, your calligraphy class transforms from a casual workshop into a gateway to artistic growth. Whether you're aiming to write your wedding invitations, personalize gift tags, or simply enjoy the meditative art of lettering, remembering these essentials ensures you're setting yourself up for success.
So gather your pens, prep your paper, and embrace the beauty of each stroke. Your calligraphy journey starts with thoughtful preparation—and the right attitude.
✅ Calligraphy Pens
✅ High-Quality Ink
✅ Thick Paper
✅ Comfortable Workspace
✅ Practice Notebook
✅ Ruler
✅ Eraser
✅ Reference Materials
✅ Inspiration Images
✅ Positive Attitude
#pens #calligraphy #tools #writing #ink #supplies #paper #workspace #comfort #notebook #practice #ruler #eraser #reference #learning #inspiration #creativity #attitude