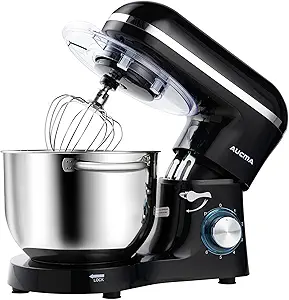
Stand Mixer
A stand mixer helps with kneading dough efficiently and easily.
Buy OnMust-Have Tools for Perfectly Baked Bread at Home
Top 10 Must-Have Tools for Baking Bread at Home Read more →
A stand mixer helps with kneading dough efficiently and easily.
Buy On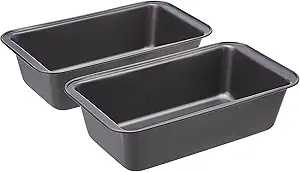
A high-quality bread pan for even baking and easy removal.
Buy On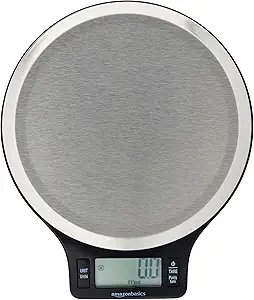
A precise digital scale for measuring ingredients accurately.
Buy On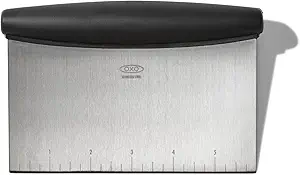
A bench scraper for cutting and handling dough easily.
Buy On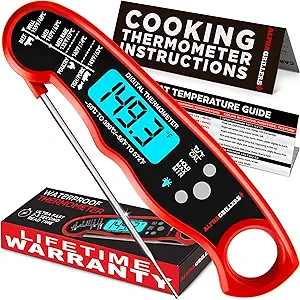
A thermometer to ensure your dough reaches the right temperature.
Buy On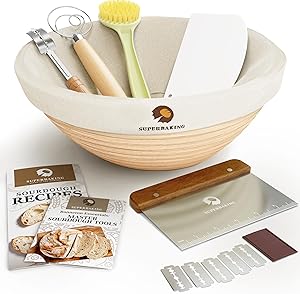
A basket to help shape and proof your dough properly.
Buy On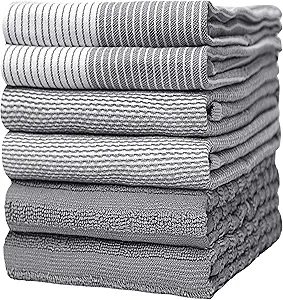
A clean kitchen towel to cover the dough while it rises.
Buy On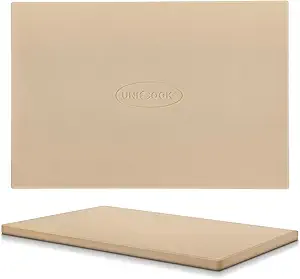
A baking stone for a crispy crust when baking bread.
Buy On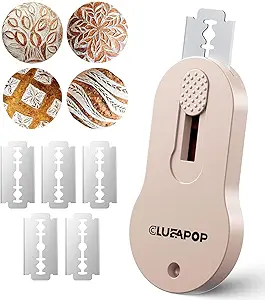
A sharp blade for scoring the dough before baking.
Buy On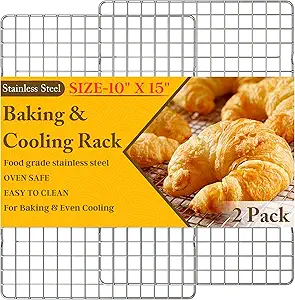
A cooling rack to help your bread cool evenly after baking.
Buy OnBaking bread at home is more than just a kitchen task—it’s an art, a science, and a deeply satisfying ritual. Whether you're kneading your first sourdough loaf or perfecting your sandwich bread, having the right tools can make all the difference between a dense flop and a bakery-worthy rise.
In this detailed guide, we’ll explore the top 10 must-have tools for baking bread at home. These essentials will help you streamline your process, improve your results, and enjoy your baking journey from start to finish.
#mixer #baking #tools
Kneading dough by hand has its charm, but a stand mixer is a game-changer for home bakers. It saves time, reduces fatigue, and ensures even kneading—especially with wetter, stickier doughs.
Powerful motor handles dense dough effortlessly
Dough hook attachment mimics hand-kneading motion
Frees you up to prep other ingredients while mixing
A model with at least a 4.5-quart bowl
Dough hook and paddle attachments
Sturdy build (metal > plastic)
Pro Tip: Start on a low speed to avoid flour clouds, and always monitor sticky doughs closely.
#pan #baking #tools
For sandwich bread, sweet loaves, or quick breads, a sturdy bread pan is a must. It helps shape your loaf and ensures even baking.
Standard size: 8.5 x 4.5 inches or 9 x 5 inches
Materials: Aluminum for even heat, nonstick for easy release
Straight sides for better rise
White and whole wheat sandwich loaves
Brioche
Banana or pumpkin bread
Pro Tip: Grease and line your pan with parchment paper for perfect release every time.
#scale #baking #tools
Precision is crucial in baking, and nothing is more precise than a digital kitchen scale. Measuring flour by volume can be inconsistent, but weight ensures accuracy.
No more guesswork—especially with flour and water
More accurate than measuring cups
Easier scaling up/down of recipes
Gram/ounce toggle
Tare function to subtract bowl weight
Battery or USB-powered options
Pro Tip: 1 cup of all-purpose flour should weigh around 120 grams. Weighing prevents over-packing and heavy loaves.
#scraper #baking #tools
A bench scraper, also known as a dough scraper, is a humble but essential tool. It’s perfect for handling, cutting, and cleaning up dough.
Dividing dough cleanly
Lifting sticky dough from the counter
Cleaning floury work surfaces
Stainless steel blade
Comfortable grip handle
Some come with measurement markings
Pro Tip: Flour your scraper lightly for sticky doughs and use it to gently fold and shape your loaf before proofing.
#thermometer #baking #tools
Temperature affects yeast activity, fermentation, and final texture. A dough thermometer ensures your dough is proofed just right and your bread is baked through.
Water for yeast: 100–110°F (38–43°C)
Ideal proofing dough: 75–80°F (24–27°C)
Baked loaf center: 190–210°F (88–99°C)
Instant-read digital for speed and accuracy
Wide temperature range
Pro Tip: Undercooked bread? Check the center with a thermometer—bread is done when internal temp hits at least 190°F.
#basket #baking #tools
To create a professional, artisanal look (especially with sourdough), a proofing basket or banneton supports the dough during final rise and leaves gorgeous patterns.
Helps dough hold shape
Encourages upward rise instead of spreading
Wicks away moisture for crisp crust
Rattan (classic look)
Plastic (easy cleaning)
Pro Tip: Dust generously with flour or rice flour to prevent sticking. Line with cloth for wetter doughs.
#towel #baking #tools
Simple yet essential, a clean kitchen towel is useful throughout the bread-making process—from covering dough to wiping down surfaces.
Draping over dough to prevent drying out
Lining proofing baskets
Cleaning spills and messes
Lint-free cotton or linen
Lightweight for airflow
Pro Tip: Use separate towels for clean-up and bread handling to avoid cross-contamination.
#stone #baking #tools
A baking stone or baking steel creates the ideal baking environment—mimicking a professional oven by holding and radiating heat evenly.
Crispy bottom crusts
Even heat distribution
Retains high heat for artisan-style baking
Boules and bâtards
Pizza, flatbreads, rustic loaves
Pro Tip: Preheat your stone in the oven for at least 45 minutes before baking. Place a tray with water underneath for steam.
#blade #baking #tools
A sharp slashing blade, or lame, allows you to score your bread before baking. Scoring guides expansion and creates beautiful patterns.
Prevents random bursting
Adds decorative flair
Controls oven spring
Curved or straight blade
Replaceable razor blades
Safety covers included
Pro Tip: Slash quickly and decisively. A shallow angle helps control crust direction.
#rack #baking #tools
Once your loaf comes out of the oven, it continues cooking from residual heat. A cooling rack allows air to circulate and prevents soggy bottoms.
Allows even cooling
Prevents over-steaming the crust
Keeps base from going soggy
Stainless steel for durability
Elevated feet for airflow
Dishwasher safe
Pro Tip: Let your bread cool for at least 1 hour before slicing—this helps retain shape and crumb structure.
Now that you’ve got the tools, let’s talk technique. Here are tips to get even more from your bread-making experience.
Yeast is temperature sensitive. If your kitchen is cold, proof dough in an oven with just the light on or a warm towel draped over the bowl.
Flavor develops during long fermentation. Consider using a fridge proof (cold retard) overnight for deeper flavor.
Don’t be afraid to try whole wheat, rye, spelt, or even heritage grains. Each adds unique flavor and texture.
A wetter dough can lead to more open crumb (think artisan sourdough), but it’s trickier to handle. Work your way up gradually.
This method strengthens dough without kneading. Gently stretch the dough and fold it over itself during bulk fermentation.
Having tools is one thing—accessibility is another. Set up a dedicated space in your kitchen with:
A drawer for your lame, scale, and thermometer
A shelf for proofing baskets and towels
A container for flour near your mixer
Labelled bins for measuring cups, scrapers, and spatulas
Baking bread at home connects you to a centuries-old tradition—and the results are worth every moment. With the right tools in your arsenal, you’ll gain confidence, consistency, and a sense of joy in every loaf.
Whether you’re gifting a warm sourdough to a neighbor, making fresh focaccia for dinner, or teaching your kids to bake, these essentials will make your kitchen feel like a professional bakery.
#baking #mixer #tools #pan #scale #scraper #thermometer #basket #towel #stone #blade #rack