
Safety Goggles
Protect your eyes from any splashes during the soap-making process.
Buy OnKey essentials to bring for a fun and successful soap-making class.
Top 10 Essentials for a DIY Soap Making Class: A 3000-Word Guide to Crafting Sudsy Succes Read more →
Protect your eyes from any splashes during the soap-making process.
Buy On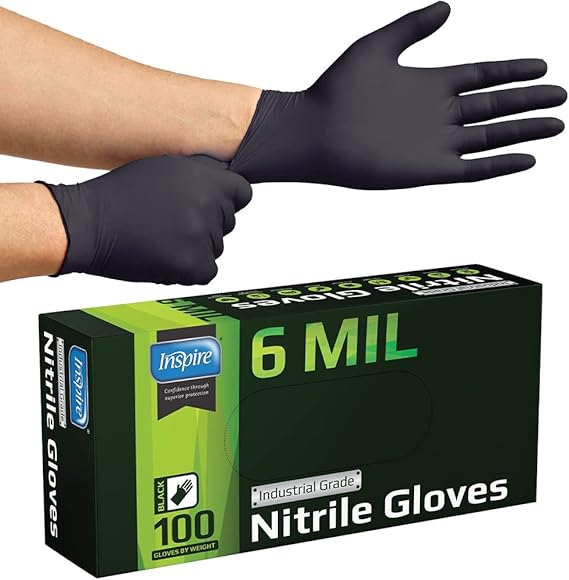
Wear gloves to protect your hands from harsh ingredients.
Buy On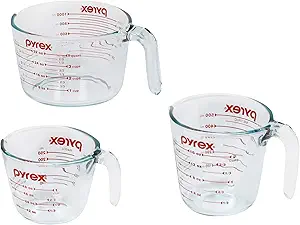
Accurate measurements are crucial for soap making.
Buy On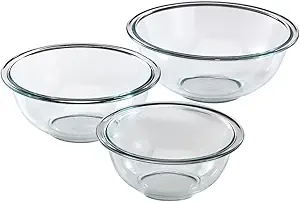
Have a few mixing bowls to combine your ingredients.
Buy On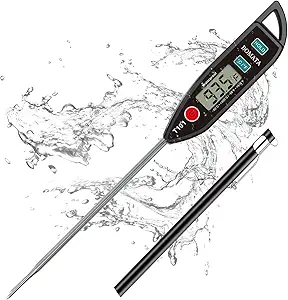
Use a thermometer to monitor the temperature of your ingredients.
Buy On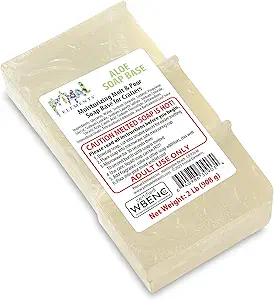
Bring your choice of soap base (e.g., glycerin or shea butter).
Buy On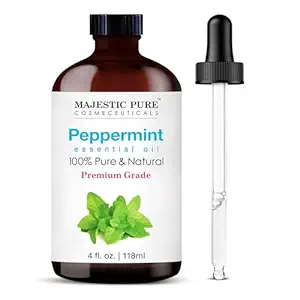
Choose your favorite essential oils for scenting your soap.
Buy On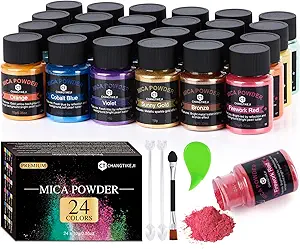
Add color to your soap with safe, soap-specific colorants.
Buy On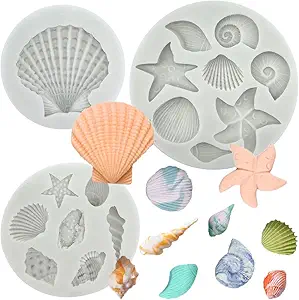
Bring molds to shape your soap once it’s ready.
Buy On
Don’t forget labels for your finished products to keep track of scents and ingredients.
Buy OnTop 10 Essentials for a DIY Soap Making Class: A 3000-Word Guide to Crafting Sudsy Succes
In recent years, DIY soap making has surged in popularity—not just as a hobby, but also as a sustainable and creative way to produce personal care products. Whether you're drawn by the idea of crafting personalized gifts, experimenting with scents, or embracing a zero-waste lifestyle, attending a DIY soap making class is a fantastic way to get started.
However, soap making isn’t just about melting and pouring. It’s a scientific, artistic process that requires specific tools, attention to safety, and a little bit of know-how. If you’re attending a class (online or in-person), arriving prepared with the right gear will make your experience smoother, safer, and more enjoyable.
In this detailed guide, we’ll cover the Top 10 Essentials for a DIY Soap Making Class and explain why each item matters. Whether you're new to the world of crafting or looking to upgrade your toolkit, this checklist ensures you’re set up for sudsy success.
#safety #goggles #soapmaking #DIY
Soap making often involves working with lye (sodium hydroxide)—a caustic substance that can be dangerous if it contacts your eyes. Safety goggles are a non-negotiable essential for protecting your vision.
Shields your eyes from splashes when handling lye or hot soap mixtures.
Prevents accidental irritation from essential oils or fragrances.
Required in most hands-on soap making classes for insurance and safety compliance.
Full seal around the eyes (not just glasses).
Anti-fog lenses for clear visibility.
Adjustable straps for a snug, comfortable fit.
Invest in a pair with UV protection and anti-scratch coating if you’ll be using them regularly for other DIY projects.
#gloves #safety #DIY #soapmaking
When handling lye or even essential oils in concentrated forms, gloves act as your first line of defense against burns, irritation, or allergic reactions.
Prevents skin contact with harsh ingredients.
Keeps your hands clean and hygienic.
Promotes confidence and peace of mind when mixing or pouring.
Nitrile gloves – chemical-resistant and latex-free.
Latex gloves – if you don’t have a sensitivity.
Avoid fabric gloves—they absorb liquids and can trap chemicals.
Have a backup pair just in case one tears mid-class.
#measuringcups #tools #soapmaking
Accuracy is key in soap making—especially when dealing with oils, lye, and fragrances. That’s where measuring cups come in.
Ensures balanced proportions of liquids and oils.
Prevents waste or failed batches due to incorrect measurements.
Allows you to easily follow precise class recipes.
Heat-resistant glass for melting oils.
Plastic or silicone for measuring colorants and essential oils.
Measuring spoons for small quantities.
Label separate cups for lye and fragrance oils to avoid cross-contamination.
#mixingbowls #tools #soapmaking #DIY
Stirring and combining ingredients is a big part of the process, and good mixing bowls can make the difference between chaos and calm.
Holds large volumes of melted soap base and additives.
Provides space for swirling and coloring techniques.
Allows for safe handling of hot liquids.
Stainless steel or heavy-duty plastic are best.
Avoid aluminum—it reacts with lye.
Use separate bowls for lye and oils.
Get bowls with pouring spouts to make transferring into molds easier and less messy.
#thermometer #soapmaking #tools #DIY
Soap making is temperature-sensitive. If your lye and oils aren’t within the right range when combined, the soap may separate, seize, or not cure properly.
Monitors temperatures of oils, lye water, and melted soap base.
Ensures safe and effective saponification (the chemical reaction that makes soap).
Helps achieve consistent results.
Digital infrared thermometers – fast and easy.
Candy thermometers – great for continuous monitoring.
Have separate thermometers for lye and oils to avoid contamination.
#soapbase #ingredients #soapmaking #DIY
The foundation of your soap is the base—this is what gets melted, mixed, and molded into your final product.
Contains the essential fats and oils that react with lye.
Sets the tone for your soap’s texture, lather, and moisture content.
Allows you to customize with scents, colors, and additives.
Glycerin (clear or white)
Goat’s milk
Shea butter or olive oil base
Melt-and-pour bases for beginners
Buy extra so you can experiment with layering, embedding, or swirling designs.
#essentialoils #fragrance #soapmaking #DIY
Your soap’s aroma is what makes it personal and luxurious. Essential oils offer natural scents and even skincare benefits.
Adds scent and therapeutic qualities to your soap.
Allows you to create unique blends.
Offers natural alternatives to synthetic fragrances.
Lavender – calming and relaxing
Tea Tree – antibacterial
Peppermint – refreshing
Lemongrass – invigorating
Always measure carefully—too much oil can irritate the skin or affect soap consistency.
#colorants #crafts #soapmaking #DIY
Want to make swirls, gradients, or layers? Add colorants to bring your soap to life.
Enhances the visual appeal of your soap.
Allows for creativity and expression.
Helps distinguish scents or ingredients at a glance.
Mica powders – shiny, vibrant, and popular in artisan soap.
Natural clays – such as pink kaolin or French green clay.
Liquid colorants – easy to mix and control.
Start with light coloring—you can always deepen shades later.
#molds #crafts #soapmaking #DIY
Soap molds are where your mixture solidifies into beautiful bars. Choosing the right mold influences the shape, size, and even drying time of your final product.
Shapes your soap into bars, discs, or custom designs.
Determines the final presentation and useability.
Helps with even cooling and curing.
Silicone molds – flexible, reusable, and non-stick.
Plastic or wooden molds – great for loaf-style or bulk production.
Fun molds for special occasions (hearts, flowers, seashells).
Use a light coating of oil or rubbing alcohol for easy release, especially in detailed molds.
#labels #organization #soapmaking #DIY
Once your soap is cured, you’ll want to label it—whether you’re gifting, selling, or just organizing your own stash.
Helps identify scents, ingredients, and batch numbers.
Adds a personal or professional touch.
Useful for safety and allergy information.
Name of the soap
Ingredients (especially allergens like nuts or essential oils)
Date made
Instructions or skin type recommendations
Use waterproof or oil-resistant labels and include your name or brand if sharing or selling your soap.
Organize your supplies in a dedicated tote or toolbox. Compartments will help you avoid losing small items like measuring spoons or labels.
Bring paper towels, disinfecting wipes, and a garbage bag for your scraps. Good hygiene is part of a successful workshop.
Use your phone to document each stage—from melting and mixing to pouring and final product. It’s great for sharing, learning, or even future blogging.
Print your recipes, bring a DIY soap recipe notebook, or jot down tips your instructor gives. You’ll want to replicate your favorites later.
| Item | Purpose |
|---|---|
| Safety Goggles | Eye protection when handling lye or splashing hot mixtures |
| Gloves | Protects hands from caustic chemicals and essential oils |
| Measuring Cups | For accurately measuring oils, liquids, and colorants |
| Mixing Bowls | Holds and mixes ingredients safely and cleanly |
| Thermometer | Ensures oils and lye are at the proper temperature for saponification |
| Soap Base | The foundation ingredient for all types of soap |
| Essential Oils | Adds scent and beneficial properties |
| Colorants | Makes your soap vibrant and unique |
| Molds | Shapes your soap into beautiful, usable forms |
| Labels | Keeps your soap batches organized and ready to gift or sell |
Attending a DIY soap making class is both fun and practical. You’re not just crafting beautiful, fragrant bars of soap—you’re learning a timeless skill, embracing sustainability, and possibly even launching a creative side business.
But like any good craft, success starts with preparation. From safety goggles and gloves to the right oils and molds, these Top 10 Essentials for a DIY Soap Making Class will help ensure your class goes smoothly. Whether you’re there to learn, create, or just have fun, packing smartly ensures your full focus stays on the art of the craft.
So grab your gear, roll up your sleeves, and let the soap making magic begin. Your skin (and your gift recipients) will thank you!