Flour
The main ingredient for making soft and pliable playdough.
Buy OnCreate soft and colorful homemade playdough with these must-have ingredients and tools.
Top 10 Things to Have When Making Homemade PlaydoughCreate Hours of Colorful, Squishy Fun with These Must-Haves! Read more →
The main ingredient for making soft and pliable playdough.
Buy On
Adds texture and helps preserve the playdough.
Buy On
Needed to mix the ingredients into a dough-like consistency.
Buy On
Helps improve the texture and longevity of playdough.
Buy On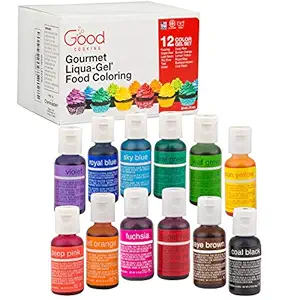
Adds bright and fun colors to your homemade playdough.
Buy On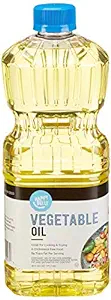
Keeps the playdough soft and prevents drying out.
Buy On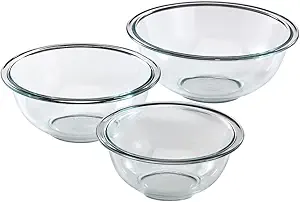
Use bowls to mix and knead the playdough ingredients.
Buy On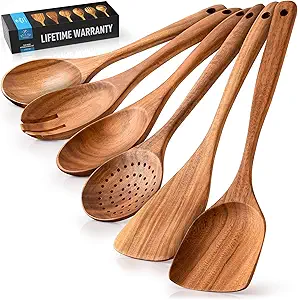
A sturdy spoon helps mix the playdough ingredients thoroughly.
Buy On
Great for flattening playdough and making fun shapes.
Buy On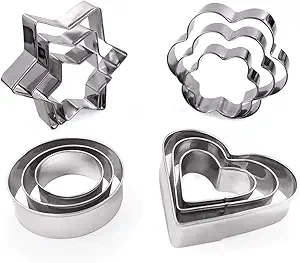
Use different shapes to make creative playdough designs.
Buy OnTop 10 Things to Have When Making Homemade Playdough
Create Hours of Colorful, Squishy Fun with These Must-Haves!
Making homemade playdough is a beloved DIY activity that kids and adults alike enjoy. It’s not only a fun sensory experience, but it also encourages creativity, improves motor skills, and provides a delightful bonding opportunity for families. Whether you’re a parent, teacher, or crafty enthusiast, making your own batch of playdough is surprisingly simple—and with the right ingredients and tools, you can achieve vibrant, soft, long-lasting results.
This comprehensive guide walks you through the top 10 things you need for making homemade playdough, how each item contributes to the process, and why these essentials make a difference. Plus, with the right SEO structure, tags, and user-friendly flow, this post is designed to delight readers and search engines alike.
The base ingredient that gives playdough its structure.
#flour #playdough #DIYcrafts
Flour acts as the main body of your playdough recipe. All-purpose flour is typically used, offering the perfect amount of softness and stretch when combined with other ingredients. It binds all the components and gives the dough its familiar pliable texture.
Pro Tip: Always sift your flour before mixing to avoid lumps and to ensure a smooth dough.
Preservation and texture enhancer in one.
#salt #homemadeplaydough #DIYfun
Salt serves multiple purposes—it strengthens the dough’s texture, helps preserve it by reducing moisture, and gives the playdough a slightly gritty feel that enhances tactile play. This humble pantry staple also helps keep the mixture safe from bacterial growth.
Pro Tip: Fine-grain table salt works best for even distribution.
Brings everything together.
#water #playdoughmixing #craftprojects
Water is essential for activating the flour and dissolving the salt, giving your playdough the consistency it needs. The amount of water you use will affect the softness and pliability of the dough, so add it gradually until you find the perfect texture.
Pro Tip: Use warm water for easier mixing and better consistency.
The secret ingredient for elasticity.
#creamoftartar #playdoughrecipe #DIYplay
Cream of tartar isn’t just for baking—it’s the magic that helps your playdough stay stretchy, soft, and long-lasting. This stabilizer prevents stickiness and extends shelf life, making your homemade dough feel as professional as store-bought.
Pro Tip: While optional, it’s highly recommended for superior texture.
Brings the playdough to life with color.
#foodcoloring #colorfulplaydough #kidscrafts
A few drops of food coloring can turn your playdough from plain to vibrant! You can use standard liquid colors, gel tints, or even natural colorants like beet juice or turmeric for a safe, colorful creation.
Pro Tip: Mix food coloring into the water before combining with dry ingredients for even distribution.
Softens and preserves the dough.
#vegetableoil #softplaydough #DIYprojects
Vegetable oil acts as a lubricant in your playdough, keeping it soft and smooth. It prevents drying and cracking, and helps the dough glide easily under hands and tools. A little goes a long way, so measure carefully.
Pro Tip: Add the oil toward the end of mixing for best results.
Where the magic happens.
#mixingbowls #homemadefun #DIYplaydough
Sturdy mixing bowls are essential to combine your ingredients properly. A medium to large-sized bowl will give you plenty of space to stir, knead, and color your dough without making a mess.
Pro Tip: Use separate bowls if you're making multiple colors at once.
For smooth and effective stirring.
#woodenspoon #craftingtools #playdoughfun
A wooden spoon is the traditional (and most effective) tool for stirring your ingredients, especially over heat. It’s strong enough to mix thick dough and gentle enough not to scratch your mixing bowl.
Pro Tip: If cooking playdough on the stove, use a heat-safe spoon and stir continuously to avoid lumps.
To flatten and shape with ease.
#rollingpin #crafttools #DIYactivities
Once your dough is ready, a rolling pin allows you to flatten it out evenly—perfect for cookie-cutter shapes or creating textured layers. This classic kitchen tool adds endless play opportunities for kids.
Pro Tip: Consider kid-sized rolling pins for smaller hands.
The ultimate shaping fun.
#cookiecutters #creativeplay #kidscrafts
Cookie cutters add excitement and creativity to playdough time. From dinosaurs and animals to hearts and stars, these tools let kids make repeatable shapes while practicing fine motor skills and imaginative storytelling.
Pro Tip: Use plastic cutters for safe, easy use with little ones.
While the core ingredients and tools are covered above, here are some extra tricks to make your DIY project smoother and more fun:
Store finished playdough in sealed containers to prevent drying.
Add a few drops of vanilla, lemon, or peppermint extract for a sensory twist.
Make your dough sparkle for holidays or themed activities.
Let them help measure, pour, and mix. It’s educational and interactive!
Especially useful if you're storing multiple batches.
Cost-Effective: Uses ingredients already in your pantry.
Customizable: You control color, texture, and scent.
Safe: No harsh chemicals or artificial additives.
Teachable Moments: A hands-on way to learn measuring, mixing, and basic chemistry.
Creative Play: Enhances storytelling, roleplay, and artistic expression.
Always supervise young children during play.
Ensure kids don’t ingest the dough (even though the ingredients are food-safe).
Wash hands before and after use to maintain cleanliness and shelf life.
Playdough is fun, but it can get messy. Here’s how to keep it under control:
Use a table cover or placemats for easy cleanup.
Keep a damp cloth handy to wipe hands and surfaces.
Store tools and dough in a labeled craft bin for easy access next time.
Making homemade playdough is more than a craft—it’s a memory-making, skill-building experience that engages all the senses. With these top 10 must-have items, you're ready to create colorful, squishy fun any day of the week. Whether it’s a rainy-day activity, a birthday party, or a quiet afternoon project, homemade playdough never goes out of style.
So gather your flour, salt, cream of tartar, and a big smile—it’s time to mix up some magic.
#flour
#playdough
#DIYcrafts
#kidsfun
#salt
#homemadeplaydough
#DIYfun
#craftsupplies
#water
#playdoughmixing
#craftprojects
#kidsactivities
#creamoftartar
#playdoughrecipe
#DIYplay
#craftessentials
#foodcoloring
#colorfulplaydough
#kidscrafts
#vegetableoil
#softplaydough
#DIYprojects
#homemade
#mixingbowls
#homemadefun
#DIYplaydough
#woodenspoon
#craftingtools
#rollingpin
#playdoughfun
#crafttools
#DIYactivities
#cookiecutters
#creativeplay