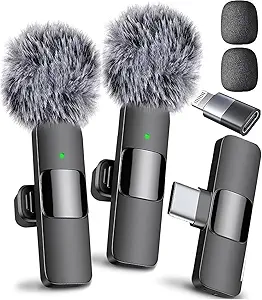
Microphone
A high-quality microphone for clear, professional audio recording.
Buy OnMust-Have Products for Launching Your Own Podcast
Top 10 Things to Have for Starting a Podcast Read more →
A high-quality microphone for clear, professional audio recording.
Buy On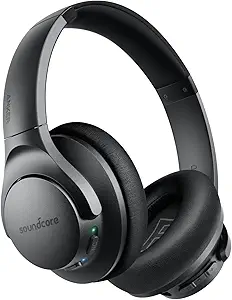
A pair of headphones for monitoring audio and ensuring sound clarity.
Buy On
An audio interface for connecting your microphone to your computer.
Buy On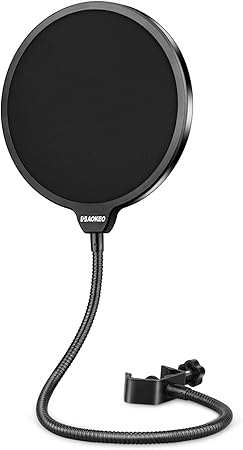
A pop filter to reduce plosives and improve audio quality.
Buy On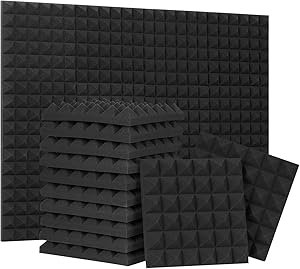
Soundproofing foam panels to minimize unwanted background noise.
Buy On
Recording software to capture and edit your podcast audio.
Buy On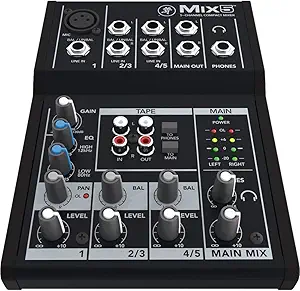
A mixer for adjusting audio levels and effects in real-time.
Buy On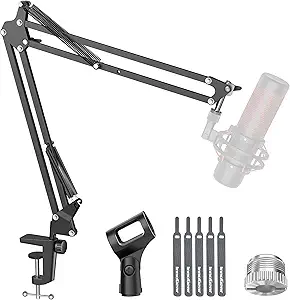
A boom arm to hold your microphone in place during recording.
Buy On
A podcast hosting platform to distribute your episodes online.
Buy On
Custom podcast cover art for branding and promoting your show.
Buy OnStarting a podcast can be an exciting creative journey, but it can also feel a bit overwhelming—what gear do you need? Which software should you use? How do you make your show sound professional? This comprehensive guide breaks down the Top 10 Things to Have for Starting a Podcast—from microphones and mixers to branding tools like podcast cover art. With practical advice, beginner-friendly steps, and real-world pro tips, you'll be well on your way to launching a podcast that stands out.
#microphone #podcasting #audio
Your microphone is the most essential piece of equipment—it’s literally how you speak directly to your audience. A great mic improves clarity, reduces background noise, and helps your voice shine.
USB Condenser Mics (e.g. Blue Yeti, Audio-Technica AT2020USB+): Plug-and-play simplicity, ideal for solo hosts or beginners.
XLR Condenser Mics (e.g. Rode NT1-A, Shure SM7B): Require an audio interface but deliver broadcast-quality sound.
Dynamic Mics (e.g. Shure SM58): Durable, less sensitive to room noise, great for casual or loud environments.
Use pop filters to reduce plosive sounds (more on that next).
Position your mic properly—6–8 inches from your mouth, angled slightly downward.
Record in a quiet space to minimize background noise.
If you're podcasting remotely with another host, add a second mic of the same model to maintain consistent audio quality.
#headphones #audio
Solid headphones help you monitor audio in real-time, catch issues like clipping or background noise, and ensure your recording sounds as intended.
Closed-back design to prevent bleed into the microphone.
Flat frequency response for accurate monitoring.
Comfortable fit for long recording sessions.
Audio-Technica ATH-M50x
Sony MDR-7506
Beyerdynamic DT 770 Pro
Record with headphones on to see how your voice sounds and address any audio quality issues immediately.
#audiointerface #tech #audioquality
If you're using an XLR microphone, you'll need an audio interface—it converts analog signals into digital with great clarity and low latency.
Focusrite Scarlett 2i2
PreSonus AudioBox USB
Universal Audio Apollo Twin
Inputs: Enough for your mics (usually two).
Phantom Power: Needed for condenser mics.
Low latency monitoring so you can listen in real time without delay.
Set your input gain correctly—too low sounds muffled, too high clips. Speak at your regular volume and adjust gain until your loudest spoken sound peaks around -6 dB.
#popfilter #audio #audioquality
A pop filter sits between your mic and your mouth to absorb plosives—hard “p” and “b” sounds that can distort audio.
Reduces plosives and microphone breath overload.
Keeps your mic clean from moisture.
Helps maintain consistent volume levels.
Position your pop filter about 2–3 inches from both mic and mouth. Wash or replace it occasionally to prevent build-up.
#soundproofing #audioquality #podcasting
Even the best mic sounds mediocre in an echoey room. Soundproofing foam turns your space into a professional recording environment.
Install acoustic foam panels on your walls at reflection zones.
Use a thick rug and soft furniture to absorb sound.
For portable setups, consider a reflection filter behind your mic.
Stand lamp reflectivity: stand 45° off-axis. Portable recording booths are also an option if you're tight on space.
#recordingsoftware #editing #podcasting
You’ll need software to capture and edit your podcast. The right digital audio workstation (DAW) makes editing, mixing, and exporting your episodes easy.
Audacity: Free, beginner-friendly.
GarageBand: Great for Mac users.
Adobe Audition, Reaper, Hindenburg Journalist: More advanced features for pros.
Record at 44.1 kHz / 16-bit quality. Save as WAV during editing and export as MP3 for final episodes. Learn essential editing techniques like noise reduction, EQ, and compression.
#mixer #audio #podcasting
A mixer adds more control: multiple mic inputs, real-time EQ, and sound effects. It's invaluable if you have interviews, live callers, or multiple co-hosts.
Behringer Xenyx Q802USB
Yamaha MG10XU
Roland Go:Mixer Pro (for mobile)
Learn your mixer’s functions—gain, pan, EQ, and workstation routing. Lock down levels and settings before recording.
#boomarm #audio #podcasting
A boom arm positions your mic correctly, freeing your desk and reducing vibrations.
Keeps your mic in consistent placement.
Minimizes noise from desk bumps.
It moves with less interruption.
Get a weighted or clamp arm that supports your mic’s weight. Consider models with integrated cable management.
#hostingplatform #distribution #podcasting
Once you've recorded and edited your episodes, where do you upload them? A robust podcast hosting platform stores your files and distributes them to listeners.
Libsyn
Podbean
Anchor (free)
Buzzsprout
Transistor
RSS feed support (Apple, Spotify, Google, etc.)
Storage & bandwidth
Monetization features
Analytics dashboards
Start simple with a free plan; upgrade as your audience grows.
#coverart #branding #podcasting
Your cover art is your podcast's calling card. It’s the first thing listeners see, so make it professional, clear, and memorable—even in tiny thumbnail size.
Size: 3000x3000 px at 72 DPI.
Use a readable font, clear title, and relevant imagery.
Maintain consistent branding with website and social media.
Save as JPEG or PNG, under 500 KB.
Canva
Adobe Spark
Photoshop
Consider hiring a designer on platforms like Fiverr or Upwork for unique branding.
Setup: Desk with mic, boom arm, headphones; sound panels behind you; mic plugged into interface, into DAW.
Recording Session:
Open DAW, arm tracks.
Adjust gain, test plosives, do a few test lines.
Hit record: intro, main content, outro.
Editing:
Trim pauses, add music/ads, adjust EQ, compress.
Noise reduction and normalization.
Export final MP3 with metadata (ID3 tags).
Publishing:
Upload to hosting platform.
Write show notes, upload cover art.
Distribute to Apple, Spotify, Google.
Promote on social media.
| Common Issue | Solution |
|---|---|
| Mic too loud | Move mic farther; use a pop filter |
| Room echo | Add more foam panels and soft surfaces |
| Audio too quiet | Adjust input gain, monitor levels |
| Editing fatigue | Take breaks or hire an editor |
| Weak branding | Invest in strong cover art and consistent fonts |
Weeks 1–2: Research format, gear, and concept. Buy your gear.
Week 3: Record test episodes, experiment with editing.
Week 4: Finalize hosting, do a few full recordings.
Week 5: Prepare launch: 3 episodes ready, cover art, show notes.
Launch Week: Go live, promote heavily, collect feedback.
Month 2+: Monitor analytics, refine content, consider monetization.
Launching a podcast takes creativity, consistency, and the right setup. With these Top 10 essentials—from the microphone and mixing gear to software and branding—you're equipped to launch a show that sounds polished and grows an audience. Remember, the best podcasts start with passion and quality.
Here’s to your podcasting success—let your voice be heard!