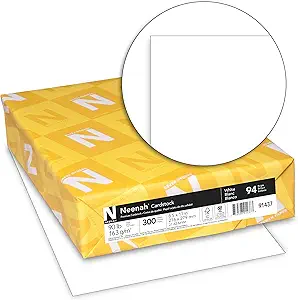
Cardstock
High-quality cardstock provides a sturdy base for handmade cards.
Buy OnMust-Have Items for Crafting Beautiful Handmade Cards
Top 10 Things to Have for Making Handmade Greeting Cards Read more →
High-quality cardstock provides a sturdy base for handmade cards.
Buy On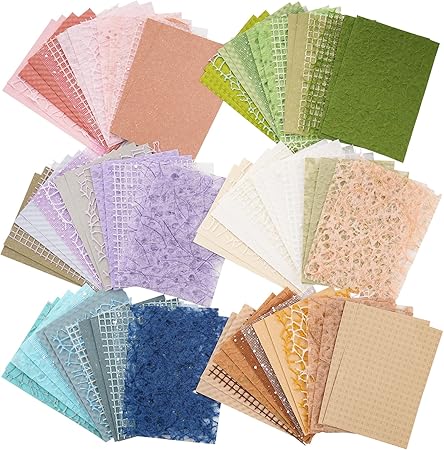
Patterned or textured paper adds creativity and depth to your designs.
Buy On
Precision cutting tools help create clean edges and intricate designs.
Buy On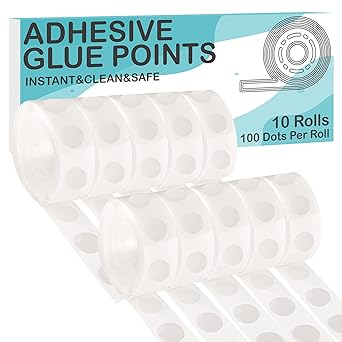
Various adhesives help assemble and layer elements securely.
Buy On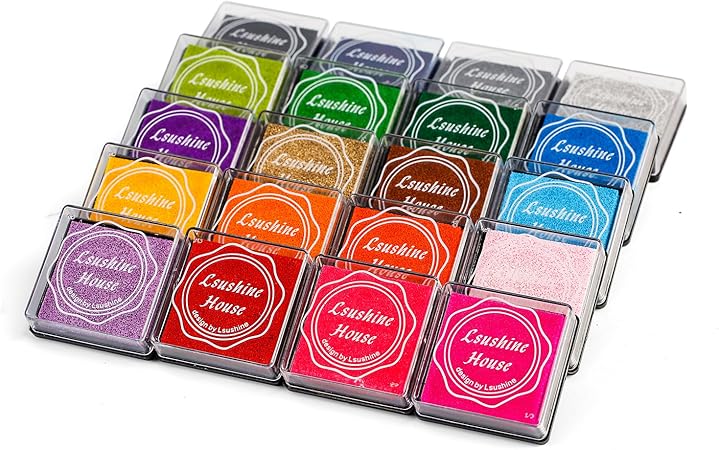
Stamps add unique designs and personalized messages to cards.
Buy On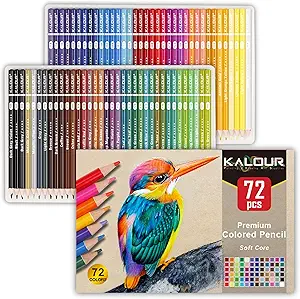
These help add colorful designs, lettering, and personal touches.
Buy On
Decorative elements enhance the visual appeal of handmade cards.
Buy On
These tools help create unique shapes and cutouts for card designs.
Buy On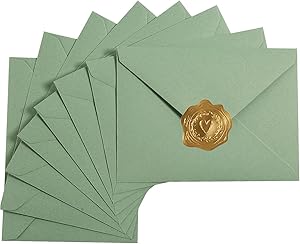
Matching envelopes complete the presentation of handmade greeting cards.
Buy On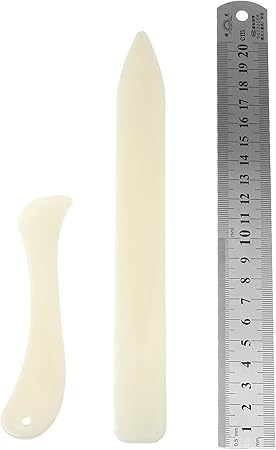
These tools help measure and create crisp, professional folds.
Buy OnThere’s something undeniably special about receiving a handmade greeting card. It carries more than just a message—it holds intention, creativity, and a personal touch that digital greetings simply can’t replicate. Whether you're crafting cards for birthdays, holidays, weddings, or just to say “hello,” the process of creating handmade greeting cards is as joyful as the result.
But before diving into your next DIY project, it’s essential to be well-equipped. With the right tools and materials, you can bring your creative vision to life and elevate your card-making to professional-looking artistry.
In this comprehensive guide, we’ll explore the Top 10 things you need to make your handmade greeting cards truly stand out. From basic supplies like cardstock and adhesives to artistic elements like stamps, markers, and embellishments, we’ve got you covered.
#cardstock #papercrafts #handmadecards #DIYcards
Every great card starts with a strong base. Cardstock is the heavyweight paper used as the core of your greeting card. It provides a sturdy surface that holds up to embellishments, ink, and layers of design.
Available in a wide range of colors, textures, and finishes.
Provides stability and durability.
Comes in various weights; heavier cardstock is ideal for card bases.
Opt for acid-free cardstock to preserve your card’s quality over time and prevent yellowing.
#decorativepaper #scrapbooking #crafts #cardmaking
While cardstock is your foundation, decorative paper brings your design to life. From floral patterns and geometric prints to glittered or textured finishes, decorative paper adds flair and theme to your greeting cards.
Background layers or borders.
Die-cut shapes or folded accents.
Paper piecing or layered effects.
Mix and match complementary patterns or create visual contrast with bold color combinations.
#scissors #craftknife #crafttools #papercrafts
Cutting is an essential part of any card-making process. A sharp pair of craft scissors and a reliable craft knife allow you to trim, shape, and detail your paper with control and accuracy.
Precision scissors for fussy cuts and intricate edges.
Craft knife for cutting out detailed shapes or creating windows.
A self-healing cutting mat to protect your work surface.
Always use a metal ruler when cutting with a craft knife for straight lines.
#adhesives #glue #craftsupplies #DIYcards
No handmade card would hold together without reliable adhesives. But not all glues are created equal! Different projects call for different adhesive types.
Glue stick: For lightweight decorative paper.
Double-sided tape: For invisible sticking with no mess.
Glue dots: Perfect for attaching embellishments.
Liquid glue: Great for intricate shapes and precision application.
Avoid oversaturating paper with liquid glue—it can cause warping. Use sparingly!
#stamps #inkpads #handmadecrafts #cardmaking
Nothing says “handmade” like a beautiful stamp impression. With rubber or clear stamps and colorful ink pads, you can instantly add patterns, borders, sentiments, or focal illustrations.
Saves time compared to hand-drawing.
Provides consistent and repeatable designs.
Offers a professional-looking finish.
Use dye inks for fast drying and crisp images.
Use pigment inks for rich color and embossing.
#markers #coloredpencils #handlettering #craftsupplies
From coloring stamped images to hand-lettering sentiments, markers, pens, and colored pencils allow you to personalize your designs and bring vibrancy to your cards.
Alcohol markers for smooth, streak-free coloring.
Fine-tip pens for outlines and doodles.
Watercolor pencils for blending effects.
Gel pens for metallic or glitter finishes.
Keep a color swatch chart of your pens and markers to help you quickly find the right shade.
#embellishments #stickers #carddecor #handmadecards
Embellishments take your cards from pretty to stunning. Think stickers, ribbons, buttons, sequins, brads, charms, and more. These decorative items add texture, dimension, and visual interest.
Stickers: Great for quick themes or sentiments.
Ribbon and twine: Add softness or wrap around card folds.
Buttons and sequins: Perfect for sparkle and tactile elements.
Use a small tackle box or craft drawer to organize your embellishments by color or type.
#diecuts #craftpunches #DIYcards #crafttools
Die cuts and punches allow you to cut out uniform shapes, letters, or images in seconds. They're especially handy for creating flowers, hearts, banners, or monograms.
Manual die-cutting machines like Cricut or Sizzix.
Handheld craft punches for basic shapes like circles and stars.
Layer die-cut shapes to create 3D effects, or stack letters for bold sentiment designs.
#envelopes #stationery #handmadecards #papercrafts
What’s a greeting card without the perfect envelope? Envelopes not only protect your card but also make the first impression before it’s even opened.
Blank envelopes you can decorate or stamp.
Colored or textured envelopes for extra style.
Custom sizes for uniquely shaped cards.
Use decorative paper or leftover scraps to make your own envelopes with a template or envelope punch board.
#ruler #bonefolder #crafttools #DIYcards
Two of the most underrated but crucial tools in card-making are the ruler and bone folder. Together, they help you create perfect folds, measure dimensions, and keep your layout sharp.
Crease cardstock cleanly and evenly.
Burnish folds to reduce cracking.
Help with envelope making and scoring.
Choose a clear acrylic or metal ruler with grid lines.
Use the ruler for layout planning, cutting guides, and spacing embellishments.
If you're ready to take your handmade cards to the next level, consider these additions to your toolbox:
Scoring board: For consistent folds and lines.
Corner rounder punch: Adds a soft, finished touch to corners.
Heat gun: For embossing stamped designs.
Embossing powders: Add texture and shimmer to inked areas.
Calligraphy pens: Perfect for personalized sentiments.
Even the best tools need a thoughtful plan. Here’s a simple step-by-step guide for creating a beautiful handmade card:
Think birthdays, thank-yous, holidays, or “just because.” Let that guide your design choices.
Stick to 2–4 complementary colors for a cohesive look.
Pull your cardstock, decorative paper, and embellishments ahead of time.
Map out where your elements will go, either mentally or with a pencil on scratch paper.
Start with your background, then build up layers with adhesive, die-cuts, or stamps.
Use stamps, pens, or die-cut letters for your message.
Add accents last, and don’t overcrowd. Less is often more.
Once dry, slide your finished card into a clean, decorative envelope.
Looking for inspiration? Try one of these easy project ideas:
Use flower stamps, pastel paper, and a “thank you” sentiment.
Add a paper-folded birthday cake or balloon embellishment.
Red cardstock, heart-shaped punches, and hand-lettered messages.
Snowflake punches, metallic pens, and seasonal sentiments.
Soft yellow or blue tones with button or ribbon details.
Aside from being fun, making handmade cards comes with a host of personal benefits:
Creativity Boost – Each card is a mini art project.
Mindfulness & Relaxation – The process is calming and therapeutic.
Thoughtful Gift – A handmade card is more meaningful than store-bought ones.
Skill Building – Practice art, design, hand lettering, and more.
Eco-Friendly – Repurpose scraps and avoid mass-produced waste.
A well-organized workspace makes crafting more enjoyable and efficient. Here are a few storage tips:
Use drawers or plastic bins for separating tools and materials.
Label everything—scissors, stamps, embellishments, adhesives.
Store paper flat to prevent creasing or bending.
Keep a travel kit for crafting on the go or at events.
Creating handmade greeting cards is one of the most rewarding ways to express yourself and brighten someone’s day. With the right supplies—like cardstock, scissors, adhesives, and embellishments—you’ll be ready to design, personalize, and share beautiful cards that people will treasure.
Whether you’re making a heartfelt thank-you card, a joyful birthday greeting, or a holiday surprise, these ten essential tools will help you turn your creative ideas into keepsakes.
So pull out your craft kit, clear off the table, and let your imagination take flight—because every card you create is a little piece of art with a whole lot of heart.
#cardstock
#papercrafts
#handmadecards
#DIY
#decorativepaper
#crafts
#scrapbooking
#DIYcards
#scissors
#craftknife
#adhesives
#glue
#cardmaking
#craftsupplies
#stamps
#inkpads
#handmadecrafts
#markers
#coloredpencils
#handlettering
#embellishments
#stickers
#carddecor
#diecuts
#craftpunches
#envelopes
#stationery
#ruler
#bonefolder
#crafttools