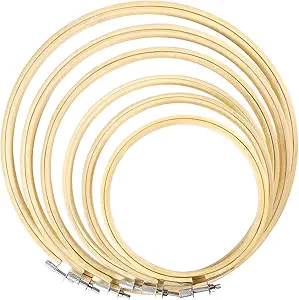
Embroidery Hoop
An embroidery hoop keeps fabric taut for easier stitching and control.
Buy OnMust-Have Items for a Successful First Embroidery Class
Top 10 Things to Have for Going to Your First Embroidery Class Read more →
An embroidery hoop keeps fabric taut for easier stitching and control.
Buy On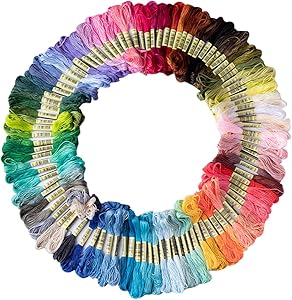
Quality embroidery floss in various colors adds vibrancy to your projects.
Buy On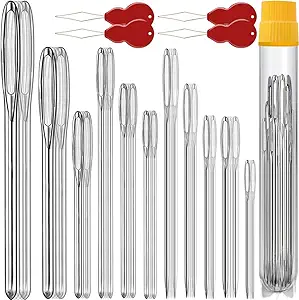
Assorted needles designed for embroidery make stitching easier.
Buy On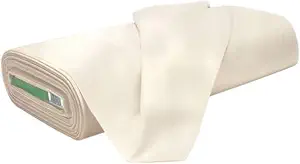
Bring fabric suitable for embroidery; cotton works well for beginners.
Buy On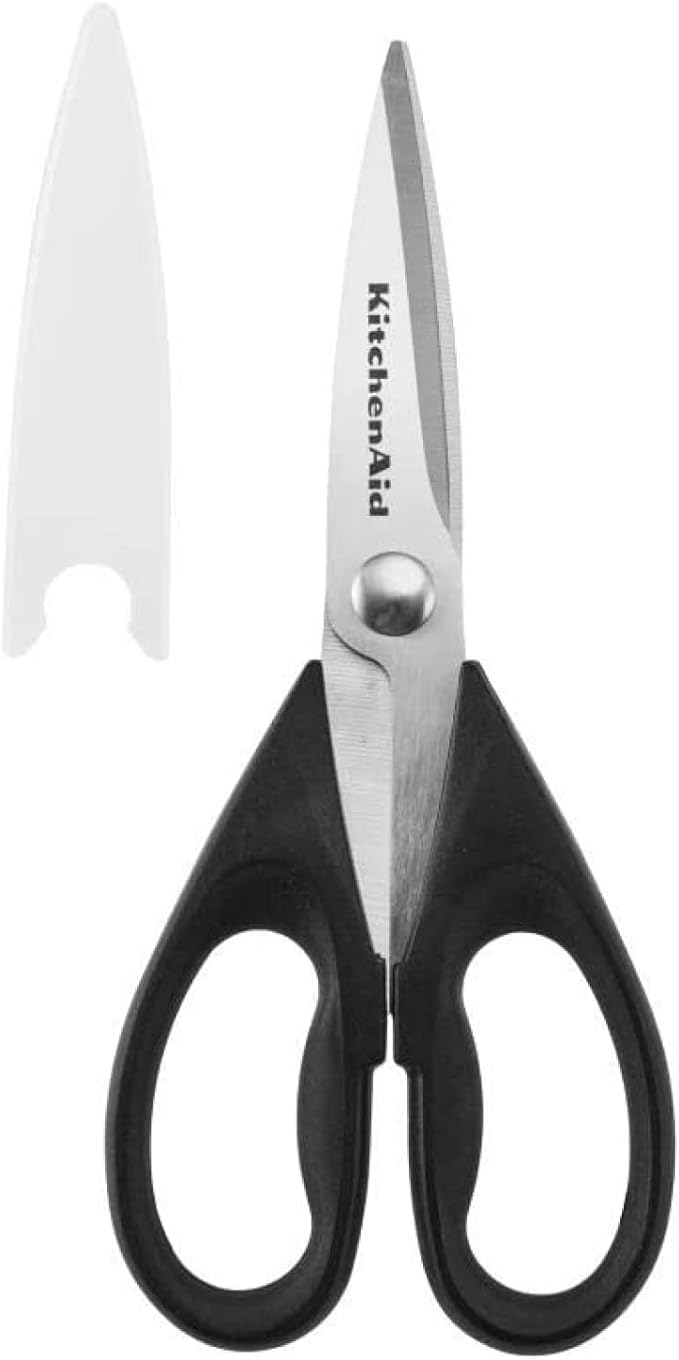
Small, sharp embroidery scissors are essential for precise thread cutting.
Buy On
A needle threader simplifies threading, especially with fine needles.
Buy On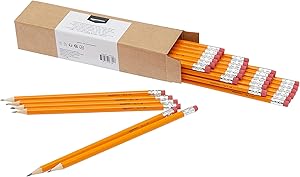
A pencil allows you to lightly sketch designs on fabric before stitching.
Buy On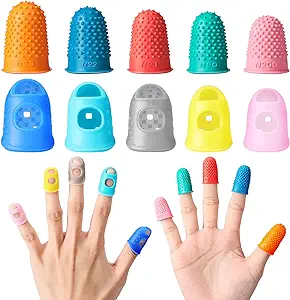
Protect your fingers from needle pricks with a comfortable thimble.
Buy On
A tote bag is handy for carrying your embroidery supplies to and from class.
Buy On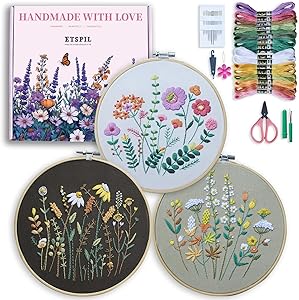
Bring a beginner-friendly pattern to guide your first project.
Buy OnEmbroidery has experienced a creative resurgence in recent years. Once considered a traditional craft, it’s now a popular form of self-expression, relaxation, and even mindfulness. If you’re getting ready for your first embroidery class, congratulations—you’re about to enter a colorful world of art stitched in time.
But as with any creative journey, the right tools can make a big difference. Being well-prepared allows you to focus on learning, practicing, and enjoying the process. Whether your goal is to embellish clothing, create framed art, or just try something new, having these essentials will help you hit the ground stitching.
Below is your ultimate checklist of the Top 10 Things to Have for Going to Your First Embroidery Class—plus expert tips and insights to help you feel confident from the very first stitch.
Your foundational frame for flawless stitching.
The embroidery hoop is the first tool you’ll want to get acquainted with. It holds your fabric tight and flat, making it easier to create precise stitches. For beginners, a hoop helps you develop even tension and prevents puckering.
Size matters: Start with a medium hoop (6–8 inches) for a manageable workspace
Material: Wooden hoops are popular, but plastic hoops grip tighter for beginners
Fit and finish: Look for smooth edges and a secure screw tightener
Adjustability: Make sure it holds your fabric taut without slipping
Without a hoop, even the most beautiful pattern can turn into a frustrating experience.
🔖 Tags: #hoop #embroidery #class #tools
The colorful thread that brings designs to life.
Embroidery floss is the medium for your creativity. It’s typically made from cotton and comes in strands that can be separated depending on the thickness you want. This is where your art begins!
6-strand cotton floss is most common for beginners
Choose varied colors to bring your patterns to life
Brands like DMC or Anchor offer quality and colorfastness
Keep your floss organized with bobbins or a floss case
Your instructor may ask you to bring certain colors, or you might receive a kit with the class.
🔖 Tags: #floss #thread #embroidery #tools
The precision tool every stitcher needs.
Embroidery needles are different from sewing needles—they have a larger eye to accommodate thicker threads and come in various sizes.
Crewel needles: Great for most embroidery stitches
Tapestry needles: Ideal for counted cross stitch or thicker threads
Sharps: For more detailed and delicate work
Beginners usually start with size 7–9 crewel needles
Always bring a few extras—needles tend to roll away or get misplaced during class.
🔖 Tags: #needles #tools #embroidery #class
Your canvas for creativity.
Just like an artist needs a canvas, embroiderers need the right fabric. The type of fabric you use determines how easy or difficult it is to work on your pattern.
Cotton or linen blends: Smooth and forgiving for new hands
Muslin: Inexpensive and great for practice
Aida cloth: Useful for counted cross-stitch beginners
Light colors: Make it easier to see your stitches and transfer patterns
You’ll typically want to pre-wash and iron your fabric to avoid shrinking or distortion later.
🔖 Tags: #fabric #embroidery #beginners #class
Cut with precision and protect your thread.
Every embroidery kit needs a small, sharp pair of scissors—not your general kitchen or craft shears. These are used for cutting floss, trimming fabric, and cleaning up frayed ends.
Small size: Fits in your kit and handles thread with ease
Sharp tips: For snipping close to the fabric
Embroidery-specific scissors: Like stork scissors or snips
Avoid dull blades—they can fray your thread or damage your work
Always carry a protective cover to prevent accidents in your #totebag.
🔖 Tags: #scissors #tools #thread #embroidery
A tiny tool that saves time and frustration.
Threading needles is tricky, especially when working with multiple strands. A needle threader is a small but mighty addition to your kit that can make the process far easier.
Wire loop threaders: Best for standard embroidery floss
Flat threaders with a handle: Easier for those with dexterity issues
Automatic needle threaders: Ideal if you plan to embroider frequently
Some kits include them, but it’s worth investing in a durable one that doesn’t bend easily.
🔖 Tags: #threader #tools #embroidery #beginners
Mark your design with precision.
Before you can stitch, you’ll need to transfer your pattern onto your fabric. A pencil or other marking tool helps sketch the lines you’ll follow during embroidery.
Water-soluble pencils: Can be wiped off with a damp cloth
Heat-erasable pens: Disappear with a quick touch of an iron
Chalk pencils: Great for darker fabrics
Transfer pens: Designed specifically for embroidery
Always test on a scrap piece to ensure it doesn’t leave permanent marks.
🔖 Tags: #pencil #design #tools #embroidery
Protect your fingers, especially on tight fabric.
A thimble is a classic sewing tool that might feel old-fashioned—but once you start working on tighter weaves or pushing through multiple layers, you’ll be glad to have one.
Metal or leather options are common
Choose a snug fit for control
Some thimbles have grip dimples for added precision
Rubber thimbles can offer more comfort and flexibility
It’s a must-have if you plan on spending long hours stitching or working with thicker threads.
🔖 Tags: #thimble #safety #tools #embroidery
Keep your supplies organized and portable.
With so many little tools and threads, you’ll need a dedicated tote bag to keep everything in one place. Whether you’re commuting to class or practicing at home, an organized bag makes a big difference.
Zippered pouches for floss and needles
Pencil case for marking tools
Pocket for your hoop and fabric
Room for your pattern book and scissors
Bonus: Add labels or compartments for easy access
Choose something lightweight, durable, and easy to clean—crafting can get messy!
🔖 Tags: #totebag #storage #organization #embroidery
Your first step toward stitching success.
Having a beginner-friendly pattern to follow takes the guesswork out of your first class. These designs use basic stitches and offer clear visual guides, helping you build confidence as you go.
Choose something simple and achievable (florals, quotes, animals)
Opt for patterns that include step-by-step instructions
Transfer the design with a pencil, transfer paper, or pre-printed fabric
Ask your instructor for pattern recommendations
Once you finish your first pattern, you’ll feel an incredible sense of accomplishment—and likely be hooked for life.
🔖 Tags: #pattern #beginners #design #embroidery
Starting something new can be intimidating—but it doesn’t have to be! Here are a few tips to help you get the most out of your first embroidery experience:
Give yourself time to set up and get comfortable with your materials.
Familiarize yourself with the backstitch, running stitch, and satin stitch if you can.
Your instructor is there to help—don’t hesitate to ask about needle sizes, tension, or floss types.
Your first piece doesn’t have to be perfect. Each stitch teaches you something new.
Look for embroidery groups online or in your area for continued support and inspiration.
Beyond the fun of learning something new, embroidery offers plenty of mental and emotional benefits:
Reduces stress and anxiety through repetitive motion
Improves focus and hand-eye coordination
Connects you to a rich tradition of fiber arts
Fuels your creativity with endless project possibilities
Provides tangible results that you can display or gift
By showing up prepared with the right tools and mindset, you’ll start your embroidery journey on the right foot—and stitch by stitch, you’ll build a hobby you can enjoy for life.
Embroidery might seem intricate from the outside, but it’s incredibly welcoming—especially when you have the right essentials to support your learning. With these Top 10 Things to Have for Going to Your First Embroidery Class, you’ll feel organized, confident, and creatively empowered from day one.
Whether you’re stitching a floral pattern, a monogram, or a funny quote, each loop of thread brings you one step closer to mastering this timeless art. So gather your tools, grab your tote, and prepare to turn that blank fabric into a masterpiece.
#hoop #embroidery #class #tools #floss #thread #needles #fabric #beginners #scissors #threader #pencil #design #thimble #safety #totebag #storage #pattern