Resin
Choose from epoxy or UV resin for making durable and clear keychains.
Buy OnMust-Have Items for Crafting Custom Resin Keychains at Home
Top 10 Things to Have for Crafting Resin Keychains Read more →
Choose from epoxy or UV resin for making durable and clear keychains.
Buy On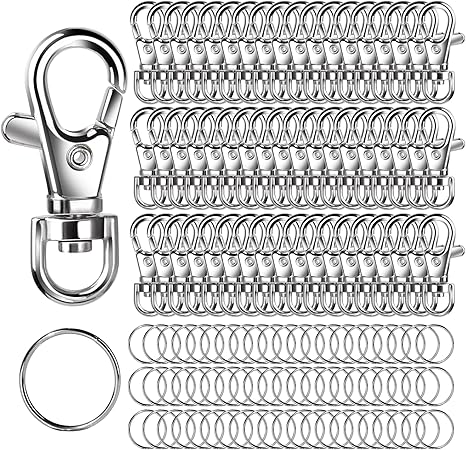
Add keyrings, lobster clasps, or split rings to create functional keychains.
Buy On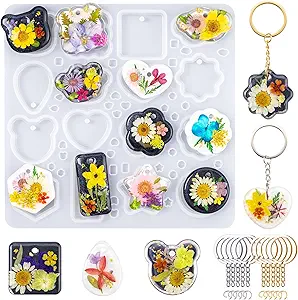
Use molds to form keychains into various shapes and designs.
Buy On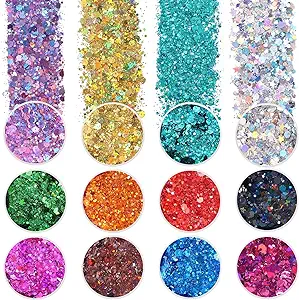
Add sparkle and fun designs to your resin keychains using glitter and sequins.
Buy On
Essential for thoroughly mixing resin and hardener to prevent bubbles.
Buy On
Add color to your resin with special pigments for a vibrant look.
Buy On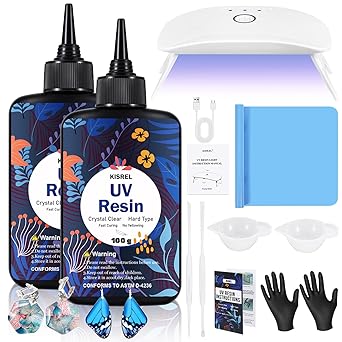
If using UV resin, a UV lamp helps cure the resin quickly for keychain-making.
Buy On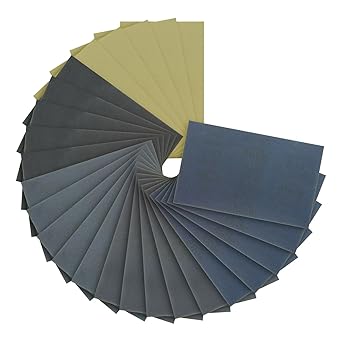
Smooth and finish the edges of your keychains after they cure for a professional look.
Buy On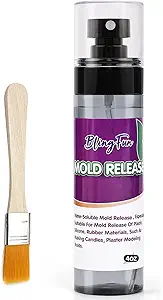
Use spray to easily remove resin from molds without damaging the shape.
Buy On
Protect your hands and skin while working with resin and other chemicals.
Buy OnCrafting resin keychains is a satisfying and stylish DIY hobby that allows you to blend creativity with functionality. Whether you’re a beginner or an experienced crafter, having the right tools and materials can make all the difference in the quality and success of your resin creations.
This guide covers the Top 10 Things to Have for Crafting Resin Keychains, each essential for achieving professional-looking results. From choosing the right type of resin to selecting the perfect keychain hardware and molds, you’ll find tips, product insights, and beginner-friendly advice to take your resin crafting to the next level.
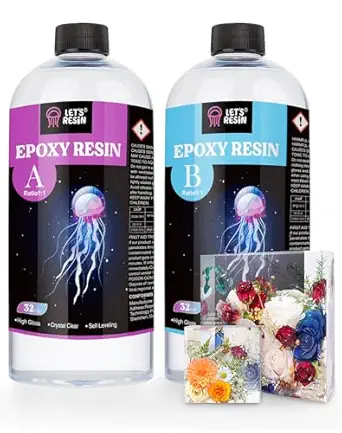
At the heart of every resin keychain is the resin itself. You’ll typically choose between epoxy resin and UV resin:
Epoxy Resin: Great for beginners, cures over a few hours, and is ideal for deep or large molds.
UV Resin: Cures quickly with a UV lamp, perfect for small molds and thin layers.
Choose high-quality, non-yellowing resin with a crystal-clear finish. The clarity and consistency of your resin directly affect the final appearance of your keychains.
💡 Tip: Always mix resin in a well-ventilated area and follow the manufacturer’s safety instructions.
Tags: #resin #resincrafts #DIYcrafts #resinart #UVresin
Without keychain hardware, your creations wouldn’t serve their core purpose. This includes:
Key rings
Jump rings
Chain links
Lobster clasps
Make sure your hardware is sturdy and rust-resistant. Silver, gold, bronze, or rainbow metal finishes can elevate the final aesthetic of your keychains.
💡 Pro Tip: Use a small set of jewelry pliers to attach the hardware securely.
Tags: #keychainhardware #keychains #keyrings #keychainmaking #keychaincraft
Silicone molds are reusable, flexible, and available in an array of shapes—letters, hearts, stars, animals, and even geometric designs.
High-quality molds result in smoother surfaces and make it easier to remove the finished resin pieces. Choose food-grade silicone for safety and durability.
💡 Crafting Hack: Coat your molds with resin release spray before pouring to make demolding effortless and extend the mold’s life.
Tags: #siliconemolds #molds #resinkeychains #DIYkeychains #resinart
Add sparkle, texture, and fun to your creations with glitter and sequins. These embellishments can transform a plain resin keychain into a magical piece.
Popular choices include:
Holographic glitter
Star or heart-shaped sequins
Mini dried flowers
Gold flakes
The key is moderation—don’t overload your design or it might sink to the bottom or clump unevenly.
💡 Mix glitters with clear resin in a separate cup before pouring for better control over placement.
Tags: #glitter #sequins #crafting #DIYcrafts #resinkeychains
Precision is everything in resin crafting, and that begins with mixing. Use silicone or wooden mixing sticks to blend resin and hardener thoroughly.
Why it matters:
Prevents soft spots due to incomplete mixing
Reduces air bubbles
Helps evenly distribute pigments or glitter
Silicone sticks are washable and reusable—an eco-friendlier choice than disposable ones.
💡 Stir slowly and consistently in figure-eight motions to avoid bubbles.
Tags: #mixingsticks #craftingtools #DIYcrafts #resincrafts
Resin pigments add beautiful color to your keychains. Choose from:
Liquid resin dye: Great for transparent color
Mica powder: Offers a shimmery, opaque finish
Alcohol ink: Creates swirling or marbled effects
A little goes a long way. Start with one drop or pinch and mix thoroughly.
💡 Blend mica powder with a drop of resin before adding to the main mix for smoother color dispersion.
Tags: #resinpigments #coloredresin #craftsupplies #resinart
If you’re working with UV resin, a UV lamp is essential. These lamps cure the resin in just minutes, making it possible to complete projects quickly.
Look for lamps with:
36W or more power
Adjustable timers
Open space for larger molds
This tool is especially handy for layering effects, fixing minor imperfections, or creating thin, small keychains.
💡 Cure one layer at a time to avoid uncured spots underneath.
Tags: #UVlamp #UVresin #resincrafts #crafttools
Once your keychain is cured and demolded, it may have rough edges or surface imperfections. Sandpaper and polishing tools are vital for refining the finish.
Use:
Wet/dry sandpaper in grits ranging from 400 to 2000+
Micro-polishing pads
Rotary tools (like Dremel) for faster work
Follow up with resin polish or a drop of resin to give your piece a glossy shine.
💡 Polishing can make your work look professional and feel smooth in hand.
Tags: #sandpaper #polishingtools #crafttools #resincrafts
Resin release spray prevents resin from sticking permanently to molds, especially important if you're using complex or textured molds.
It:
Prolongs mold life
Makes demolding easier
Prevents tearing or distortion
Apply a light, even coat before each pour and allow it to dry before use.
💡 This is especially helpful when molds start losing their non-stick properties over time.
Tags: #resinrelease #resincrafts #craftsupplies #keychainmaking
Safety first! Resin is a chemical compound, and using protective gear is essential for your well-being.
Gear to have:
Nitrile gloves (non-latex, chemical-resistant)
Safety goggles
Apron or old clothing
Respirator mask (especially for epoxy resin)
Always work in a well-ventilated area and avoid skin contact with uncured resin.
💡 Using the proper PPE ensures you can craft confidently and safely for years to come.
Tags: #gloves #protectivegear #safety #resincrafts #DIYcrafts
To help you get the most out of your crafting time, here are a few additional pro-level tips:
Pour in layers to create depth, especially when embedding objects like charms, flowers, or glitter.
Use a heat gun or toothpick to pop bubbles before curing.
Clean molds after each use with baby wipes or mild soap to maintain clarity and flexibility.
Cure your resin on a completely level surface to avoid lopsided keychains.
Crafting resin keychains is a fun and rewarding hobby that combines art, design, and hands-on creativity. Whether you're doing it for fun, gifts, or even starting your own DIY keychain business, the right tools make all the difference.
By stocking up on these top 10 essentials—from resin and keychain hardware to silicone molds and protective gear—you’re setting yourself up for stunning, high-quality creations every time.
So, gear up, get your workspace ready, and start crafting your way to beautiful resin keychains today!
#resin #keychains #DIYcrafts #resinart #keychainhardware #DIYkeychains #crafting #keyrings #siliconemolds #resinkeychains #molds #keychainmaking #glitter #sequins #mixingsticks #craftingtools #resinpigments #coloredresin #UVlamp #UVresin #crafttools #sandpaper #polishingtools #keychaincraft #resinrelease #craftsupplies #protectivegear #gloves #resincrafts #safety