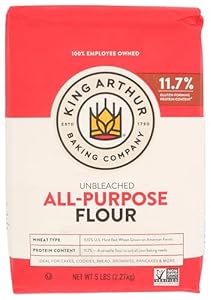
High-Quality Flour
Using bread flour or whole wheat flour improves texture and rise.
Buy OnMust-Have Items for Making Artisan-Style Bread at Home
Top 10 Things to Have for Crafting Artisan Bread Read more →
Using bread flour or whole wheat flour improves texture and rise.
Buy On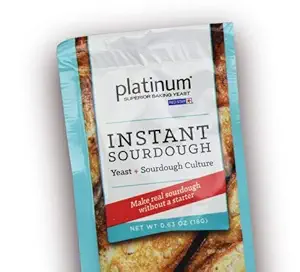
A healthy sourdough starter or quality yeast ensures a great rise.
Buy On
A proofing basket helps dough hold its shape and develop a crispy crust.
Buy On
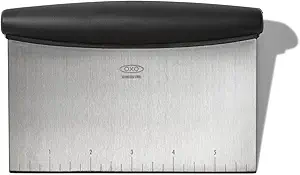
A dough scraper makes handling and shaping sticky dough easier.
Buy On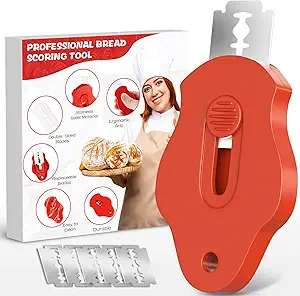
A bread lame (scoring tool) allows for decorative and controlled slashes.
Buy On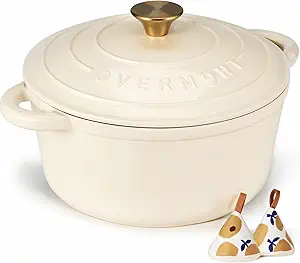
A baking stone or Dutch oven helps create a crispy, golden crust.
Buy On
Measuring ingredients precisely ensures consistent results.
Buy On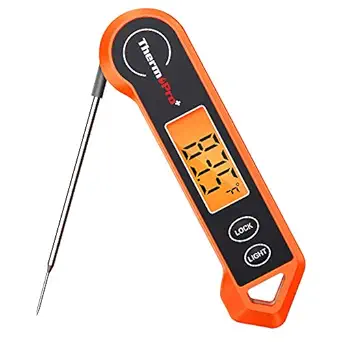
A thermometer helps check dough temperature for perfect fermentation.
Buy On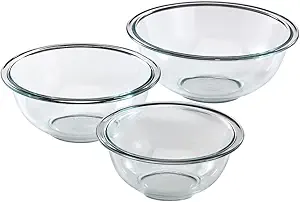
Large mixing bowls are essential for kneading and fermenting dough.
Buy OnMaster the Art of Artisan Baking from Home
Few culinary experiences are as satisfying as baking your own artisan bread—that golden, crusty loaf with a chewy interior and complex flavor that fills your kitchen with warmth. Crafting artisan bread at home might seem intimidating, but with the right tools and ingredients, it becomes a meditative, rewarding ritual.
Whether you're a seasoned baker or a total beginner, this guide will walk you through the Top 10 Things to Have for Crafting Artisan Bread like a professional. From sourdough basics to scoring techniques and fermentation secrets, we’ve got everything you need to bring bakery-quality bread into your own kitchen.
Tags: #flour #artisanbread #baking #homemade
The soul of any great bread is its flour. Your choice of flour directly impacts flavor, texture, and fermentation.
Bread flour: High in protein (12-14%) for a strong gluten network.
All-purpose flour: A versatile choice with moderate protein content.
Whole wheat flour: Adds nuttiness and depth.
Rye flour: Earthy flavor and boosts sourdough fermentation.
Pro Tip: Look for unbleached and stone-ground flour for better texture and natural flavor.
Tags: #sourdoughstarter #yeast #fermentation #artisanbread
No rise without leavening! Your bread needs either a sourdough starter (natural fermentation) or commercial yeast to create those beautiful bubbles and depth of flavor.
Sourdough Starter: A fermented mix of flour and water, full of wild yeast and bacteria for a tangy flavor.
Active Dry Yeast or Instant Yeast: More predictable, faster proofing, great for beginners.
Maintaining a sourdough starter requires daily care, but many bakers find it well worth the effort for the flavor and crust alone.
Tags: #banneton #proofing #breadbaking
A banneton basket is essential for shaping and proofing artisan loaves. It allows the dough to hold its form while developing structure and air pockets.
Keeps dough from spreading too much.
Creates a beautiful spiral or ridged pattern.
Helps wick away surface moisture for a crisp crust.
Line it with a flour-dusted cloth or use it unlined for the traditional spiral look.
Tags: #doughscraper #bakingtools #breadmaking
This humble tool is a baker’s secret weapon. A dough scraper lets you lift, divide, fold, and clean your work surface with ease.
Bench Scraper: Rectangular metal blade with a handle—great for cutting dough.
Bowl Scraper: Flexible plastic used to scrape sticky dough from bowls.
Tip: Keep it nearby to handle wet dough confidently without sticking.
Tags: #breadlame #scoring #artisan
The elegant slashes you see on artisan bread? Those are made using a bread lame, a razor-sharp tool designed to score dough before baking.
Allows controlled expansion in the oven.
Adds artistry and identity to your loaf.
Prevents dough from bursting unpredictably.
For best results, use quick, confident strokes at a shallow angle just before baking.
Tags: #bakingstone #dutchoven #artisanbread
These two baking tools are key to achieving a crispy crust and chewy crumb—the hallmarks of good artisan bread.
Baking Stone: Absorbs and evenly distributes heat, ideal for baguettes or pizzas.
Dutch Oven: Traps steam for better oven spring and crust formation.
If you use a baking stone, don’t forget to preheat it for at least 30 minutes. If using a Dutch oven, remove the lid halfway to brown the crust.
Tags: #kitchenscale #accuracy #breadbaking
Bread baking is a science. Measuring ingredients by weight rather than volume is non-negotiable for consistency and accuracy.
Ensures hydration levels are correct.
Makes scaling up or down easy.
Avoids dense or underproofed loaves due to measurement errors.
A scale with gram precision is ideal. Invest in one with a tare function for speed and accuracy.
Tags: #thermometer #breadbaking #artisanbread
How do you know your loaf is fully baked inside? Enter the instant-read thermometer.
190°F (88°C) for soft breads
200–210°F (93–99°C) for crusty artisan loaves
This tool takes the guesswork out of baking and prevents gummy or undercooked centers.
Tags: #mixingbowls #breadmaking #bakingtools
Good-quality mixing bowls make the process smoother from start to finish.
Large size for easy mixing and stretching.
Stainless steel or glass for better temperature control.
Wide base for easier kneading and folding.
Tip: If you’re into no-knead recipes, large bowls are great for long bulk fermentation periods.
Tags: #coolingrack #baking #artisan
Once your bread emerges from the oven, you’re not done yet. A cooling rack lets it cool properly so it doesn’t become soggy underneath.
Prevents moisture buildup on the bottom crust.
Helps set crumb structure before slicing.
Keeps your bread crisp and fresh longer.
Patience is key—let the bread cool at least 1 hour before slicing.
Even with the perfect toolkit, technique plays a huge role. Let’s go over some best practices to elevate your baking:
Higher hydration doughs (75–85%) result in more open crumb, but they’re stickier. Practice handling wet dough slowly to build confidence.
Instead of traditional kneading, artisan bakers often use stretch and fold methods to build gluten strength gently.
Long fermentation (up to 12–24 hours in the fridge) enhances flavor, texture, and digestibility.
Trapping steam early in the bake helps develop a blistered, glossy crust. This is why Dutch ovens or adding water to a hot tray helps.
Now that you're equipped with the top 10 essentials, try crafting these popular artisan bread varieties:
| Bread Type | Key Characteristics |
|---|---|
| Sourdough | Tangy flavor, chewy interior, crisp crust |
| Ciabatta | Open crumb, soft inside, crisp shell |
| Pain de Campagne | Country French loaf, mild flavor |
| Baguette | Long and thin with a shattering crust |
| Focaccia | Olive oil-rich and dimpled |
Each bread style introduces you to new techniques and creative possibilities.
Ingredients:
500g bread flour (#flour)
100g active sourdough starter (#sourdoughstarter)
375g water
10g salt
Instructions:
Mix flour and water. Rest for 30 min.
Add starter and salt. Mix thoroughly.
Stretch and fold every 30 mins (3–4 sets).
Bulk ferment at room temp for 4–5 hours, then refrigerate overnight.
Shape, place in a banneton (#banneton), and proof for 1–2 hours.
Preheat Dutch oven (#dutchoven) to 475°F.
Score loaf with bread lame (#breadlame).
Bake covered for 25 min, then uncovered for 15–20 min.
Cool on a rack before slicing (#coolingrack).
Crafting artisan bread at home is a journey, one that rewards patience, precision, and creativity. With these 10 essential tools—backed by centuries of bread-baking tradition and a little science—you’ll elevate your baking to pro status in no time.
Remember, artisan bread is less about perfection and more about passion. Even imperfect loaves can be delicious, comforting, and beautiful.
| Item | Why You Need It |
|---|---|
| High-Quality Flour | Foundation of taste and texture |
| Sourdough Starter or Yeast | For fermentation and rise |
| Banneton Basket | Shapes dough and supports proofing |
| Dough Scraper | Handles sticky dough with ease |
| Bread Lame | Controls oven spring and adds beauty |
| Baking Stone or Dutch Oven | Develops crust and crumb |
| Digital Kitchen Scale | Ensures accurate measurements |
| Instant-Read Thermometer | Checks internal doneness |
| Mixing Bowls | Holds and mixes ingredients |
| Cooling Rack | Prevents soggy bottom and sets structure |
Join the artisan baking community by tagging your creations with:
#flour #artisanbread #baking #homemade #sourdoughstarter #yeast #fermentation #banneton #proofing #breadbaking #doughscraper #bakingtools #breadmaking #artisan #breadlame #scoring #bakingstone #dutchoven #kitchenscale #accuracy #thermometer #mixingbowls
Ready to fire up your oven and feed your starter? Let your next loaf be your best yet. Happy baking! 🍞