Hammer
A reliable hammer for driving nails into your birdhouse structure.
Buy OnMust-Have Items for Crafting a Safe and Cozy Birdhouse
Top 10 Things to Have for Building a Birdhouse 🐦🔧 Read more →
A reliable hammer for driving nails into your birdhouse structure.
Buy On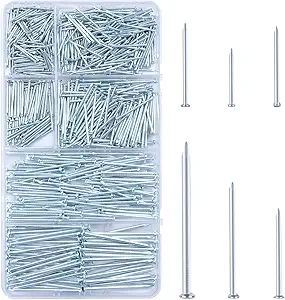
Nails are essential for assembling the pieces of your birdhouse.
Buy On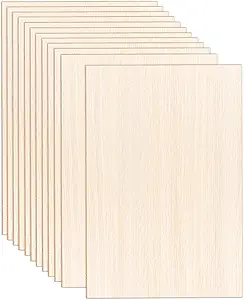
Choose sturdy wood to build the foundation of your birdhouse.
Buy On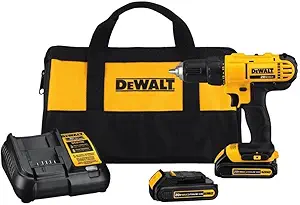
A drill is necessary for making holes for the entrance and ventilation.
Buy On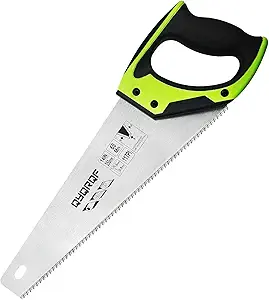
A saw helps you cut the wood to the correct size and shape.
Buy On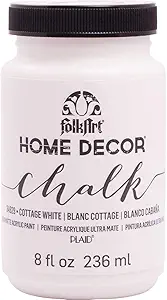
Non-toxic paint to decorate the birdhouse and provide extra weather protection.
Buy On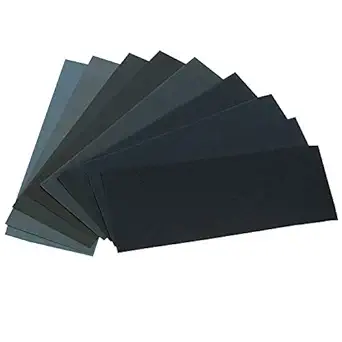
Sandpaper smooths rough edges to create a safe home for the birds.
Buy On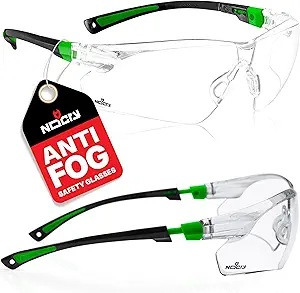
Protect your eyes when using tools like the drill or saw.
Buy On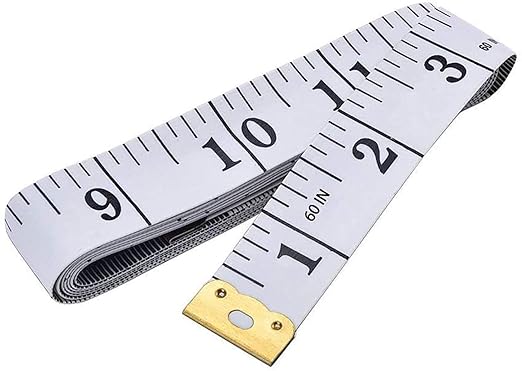
Ensure accurate measurements for a properly sized birdhouse.
Buy On
Gloves protect your hands from sharp edges while working.
Buy OnThere’s something deeply satisfying about crafting a birdhouse from raw materials and watching feathered friends take up residence. Building a birdhouse is not only a creative endeavor but also a way to connect with nature, support local wildlife, and add charm to your garden. Whether you're a seasoned DIYer or a beginner, having the right tools and materials ensures success.
In this guide, we'll walk through the Top 10 Things to Have for Building a Birdhouse—from essential woodworking tools to safety gear and finishing touches. With thoughtful planning and quality materials, you'll create a durable, attractive birdhouse that invites birds and inspires pride.
#hammer #tools #woodworking #construction
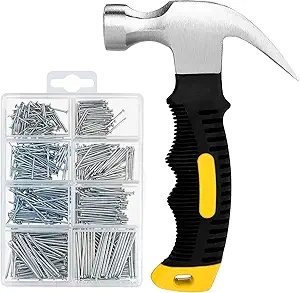
A solid hammer is essential for securing nails, driving small finishing nails, and assembling the frame. It’s simple, but indispensable.
Claw hammer (16 oz): standard for woodworking, comfortable with a balanced feel.
Rubber grip for shock absorption.
Length (12–14") gives good leverage.
Strike the nail with fluid motion—push your thumb onto the nail to hold it and give a slight tap to set it before fully driving it in.
#nails #tools #construction
Selecting the right nails is critical for ensuring a sturdy, long-lasting birdhouse.
1½” galvanized finishing nails resist rust.
18- or 16-gauge brads for delicate trim.
Keep a small quantity of 2” nails for thicker wooden parts.
Pro Tip: Bending a small nail between walls or roof panels can help hold pieces while you align others.
#wood #woodworking #birdhouse
Wood is the structural backbone—and charm—of your birdhouse design. Choose carefully for longevity, safety, and aesthetics.
Exterior-grade cedar or redwood: naturally weather-resistant and decay-resistant.
Pine or fir: cost-effective but may need treatment.
Avoid treated lumber: chemicals can harm birds.
Cut plywood panels or boards to size. Use untreated scrap wood for internal perches or dividers.
#drill #tools #woodworking
A drill helps make entrance holes, ventilation, drainage, and pilot holes for nails or screws.
Cordless drill (18V) for portability, with high torque.
Drill bits: 1⅛” hole saw for entrances, ¼” pilot bits for nails.
Countersink bit to hide screw heads.
Always drill a drainage hole at the bottom and several ventilation holes at the top to ensure a safe habitat.
#saw #tools #construction
For straight cuts and precise angles, a saw is crucial. The right saw speeds up the build and ensures clean edges.
Hand saw: budget-friendly and easy for small cuts.
Jig saw: versatile for cutouts and rounded edges.
Miter saw: ideal for angled cuts on frames and roofs.
Keep your saws sharpened and follow lines carefully for tight-fitting birdhouse walls and roof.
#paint #decorating #birdhouse #homeimprovement
Paint adds personality—and protection—to your birdhouse. Choose outdoor paint that blends with nature.
Low-VOC exterior acrylics for safety and performance.
Light, muted tones to maintain camouflage—avoid bright reds.
Use a small brush or roller for even coating.
Apply 2–3 thin coats. Leave certain surfaces unpainted—like inside walls or perches—to avoid toxicity.
#sandpaper #woodworking #tools
Smooth, snag-free surfaces are safer for nesting birds and easier for painting. Sandpaper helps prepare both.
80 grit for rough shaping
120–150 grit for smoothing surfaces
220 grit for final softness
Include the edges and entrance hole in your sanding to prevent splinters and ensure protection.
#safetyglasses #protection #tools
Protective eyewear is crucial when cutting, drilling, or painting. Safety comes first.
ANSI-rated, sealed against dust
Anti-fog and scratch-resistant lenses
Comfortable straps or temple grips
Always wear them before you turn on power tools or sand wood pieces.
#measuringtape #tools #woodworking
Precision is essential. A measuring tape ensures your birdhouse lists, walls, and roof align perfectly.
Use a 25–30 ft tape with a stable case and locking mechanism.
Mark wood with a sharp pencil or marking knife.
Double-check your dimensions—measure twice, cut once.
Accurate tape work ensures your birdhouse pieces fit snugly, resulting in greater durability.
#gloves #safety #protection #tools
A pair of work gloves protects your hands during sawing, nailing, painting, and clean-up.
Durable leather or synthetic palm
Breathable back material
Tight wrist cuff to keep out dust and splinters
Gloves reduce splinter wounds and fatigue when holding wood for long periods.
Plan & sketch your design — consider dimensions and bird species.
Measure & mark your wood panels using the measuring tape.
Cut wood for walls, floor, and roof using your saw.
Drill entrance, ventilation, drainage, and pilot holes.
Sand all surfaces and edges starting with 80 grit up to 220.
Assemble with nails/screws, using a hammer.
Paint or stain, then allow thorough drying.
Install mounting hardware on the base or roof.
Choose a sheltered location away from predators and weather exposure.
Maintain the birdhouse annually—clean and repaint as required.
Clean annually—remove old nesting material.
Position the birdhouse 6–10 ft high on tree/trunk or post, away from predators.
Use a mounting bracket for stability, not nails into trees.
Ventilation and drainage holes prevent heat and flooding.
Open with a timelapse of cutting and assembling wooden panels.
Show drilling, sanding transitions, and painting vibrantly.
End with birds inspecting and nesting.
SEO-rich title captions like “Timelapse: Custom Cedar Birdhouse Build” help visibility.
Q: What wood is safest?
A: Cedar and redwood—naturally weather-resistant and non-toxic.
Q: What hole size suits chickadees or wrens?
A: 1⅛"–1¼" for chickadees; 1" for wrens.
Q: Should you paint outside only?
A: Yes, leave interiors and entrance hole unpainted to avoid fumes.
Building a birdhouse is a joyful, hands-on project that connects you with nature and hones woodworking skills. With tools like a hammer, nails, saw, paint, and safety gear, you’re well-prepared to craft a cozy, safe home for backyard birds.
Take your time, follow this guide, and enjoy the rewarding process—from cutting wood to hearing the delightful songs of birds greeting your handiwork.
Happy building—and may your feathered friends move in soon!
Tags Recap:
#hammer #woodworking #birdhouse #tools #nails #construction #wood #building #drill #saw #paint #decorating #sandpaper #safetyglasses #protection #measuringtape #gloves #safety