
SCOBY
The Symbiotic Culture of Bacteria and Yeast (SCOBY) is essential for fermenting kombucha.
Buy OnMust-Have Items for Making Your Own Kombucha at Home
Top 10 Things to Have for Brewing Your Own Kombucha Read more →
The Symbiotic Culture of Bacteria and Yeast (SCOBY) is essential for fermenting kombucha.
Buy On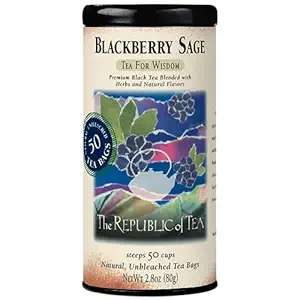
Use black or green tea as the base for your kombucha brew.
Buy On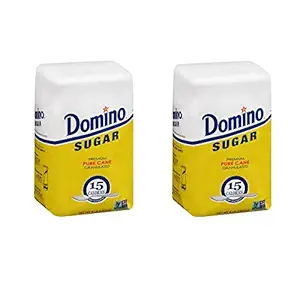
Sugar feeds the SCOBY during fermentation, turning tea into kombucha.
Buy On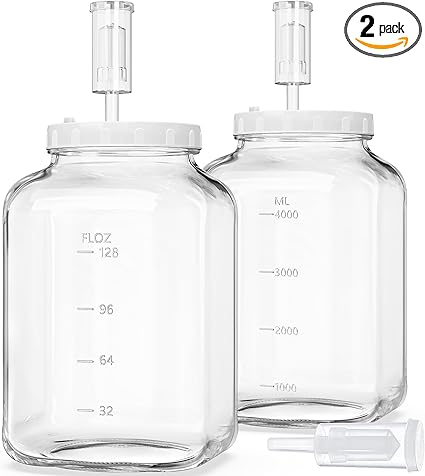
A large glass jar allows the kombucha to ferment properly.
Buy On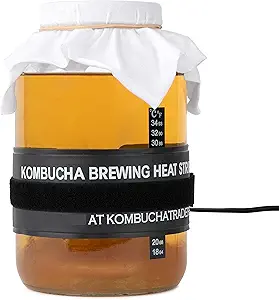
A small amount of previously brewed kombucha jumpstarts fermentation.
Buy On
A breathable cloth cover prevents contamination while allowing air circulation.
Buy On
Glass bottles with airtight lids help with carbonation in the second fermentation.
Buy On
Fruits, herbs, or spices can be added for unique kombucha flavors.
Buy On
pH strips help monitor acidity levels to ensure safe fermentation.
Buy On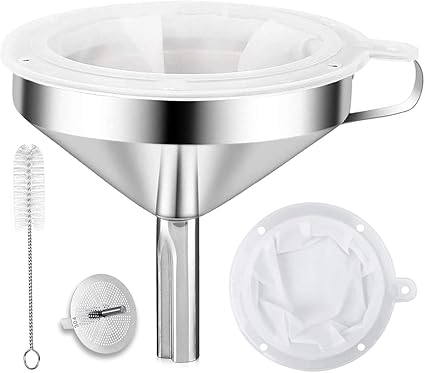
A funnel makes it easy to transfer kombucha into bottles without spills.
Buy OnUnlock the Secrets of Home Fermentation for a Healthier, Tastier Life
In recent years, kombucha has taken the wellness world by storm. This fizzy, tangy, probiotic-rich beverage is not only refreshing but also packed with health benefits. While store-bought kombucha is widely available, nothing beats the satisfaction (and cost savings) of brewing your own at home.
But before you dive into the bubbly world of fermentation, it’s crucial to have the right tools and ingredients. In this guide, we’ll walk you through the Top 10 Things to Have for Brewing Your Own Kombucha, helping you set up a homebrewing station that even a seasoned fermenter would envy.
Tags: #scoby #kombucha #fermentation
The heart and soul of kombucha brewing is the SCOBY, short for Symbiotic Culture of Bacteria and Yeast.
It’s the living organism that ferments the tea, transforming it into kombucha.
It produces natural carbonation and introduces beneficial probiotics.
A healthy SCOBY ensures consistent results and balanced acidity.
You can get a SCOBY from a kombucha-brewing friend or purchase one from a reputable online source. Always use a healthy, white-ish, rubbery SCOBY for best results.
Tags: #tea #kombucha #brewing
Quality tea is the foundation of great kombucha. The type you choose will affect flavor, color, and fermentation quality.
Black tea: Full-bodied flavor, ideal for beginners.
Green tea: Milder and slightly floral.
Oolong or white tea: Advanced brewers love experimenting with these.
Avoid herbal teas like chamomile or peppermint, which can disrupt fermentation. Stick to pure, caffeinated teas for strong, consistent brews.
Tags: #sugar #kombucha #brewing
Yes, kombucha needs sugar—but don’t worry, most of it is consumed by the SCOBY during fermentation.
Feeds the yeast and bacteria in the SCOBY.
Enables the production of natural acids and carbonation.
Use plain white cane sugar for best results. Avoid artificial sweeteners or sugar alternatives, as they can interfere with fermentation.
Tags: #brewingjar #kombucha #fermentation
Your kombucha needs a safe, clean place to ferment—enter the brewing jar.
1-gallon size or larger
Glass only—avoid plastic or metal which can leach or react with acids
Wide mouth for easy SCOBY handling
Place your jar in a warm, dark, and ventilated spot, like the top of a cupboard or pantry.
Tags: #starterliquid #kombucha #fermentation
Starter liquid is the strong, acidic liquid from a previous kombucha batch. It jumpstarts fermentation and protects your brew from harmful microbes.
From a previous homemade batch
From store-bought, raw, unflavored kombucha
You’ll typically need about 1 cup of starter liquid per gallon of tea.
Tags: #clothcover #kombucha #brewing
Fermentation needs airflow, but you also want to keep out dust, insects, and contaminants. That’s where a cloth cover comes in.
Use breathable material like cheesecloth, muslin, or a clean dish towel.
Secure it with a rubber band or string to keep it tightly in place.
Avoid using a solid lid—it blocks air, which is essential for fermentation.
Tags: #bottles #kombucha #fermentation
Once your kombucha has fermented, it’s time for bottling and flavoring. You’ll need airtight bottles for this process, which allows carbonation to build up.
Flip-top glass bottles work best
Withstand pressure (carbonation!)
Easy to clean
Always burp your bottles once a day during secondary fermentation to avoid explosions.
Tags: #flavoring #kombucha #brewing
The second fermentation is where the magic of flavor happens. Add your favorite flavoring ingredients to customize your kombucha.
Fruit juices: Mango, cherry, pomegranate
Herbs: Ginger, mint, lavender
Spices: Turmeric, cinnamon, vanilla
Add flavorings after the first fermentation when bottling, and let it sit for 2–5 days to develop fizz and flavor.
Tags: #pHstrips #fermentation #kombucha
Fermentation is a pH-sensitive process. To ensure your kombucha is safe and properly fermented, use pH strips to monitor acidity.
Ensures your kombucha is below pH 4.6 (the safe zone)
Helps you identify when it’s ready
Prevents mold and spoilage
Check your brew regularly and document pH trends to better understand your fermentation timeline.
Tags: #funnel #kombucha #brewing
You’ll need a funnel to transfer your kombucha from the brewing jar into bottles—neatly and without mess.
Prevents spills and waste
Helps add flavoring ingredients
Useful for transferring starter liquid to a new jar
Choose a wide-mouth funnel made of stainless steel or food-grade plastic.
Always wash your hands and sterilize all equipment before brewing. Kombucha is a live culture—keeping things clean prevents contamination.
Fermentation takes time. Expect 7–10 days for your first fermentation depending on temperature and flavor preferences.
Ideal fermentation temp is 68–78°F (20–25°C). Use a brewing belt or a warm spot in winter to maintain a steady environment.
Primary fermentation: Tea + sugar + SCOBY
Secondary fermentation: Bottled kombucha + flavoring ingredients
Here’s your home kombucha brewing kit at a glance:
| Item | Use |
|---|---|
| SCOBY | Ferments the tea |
| Tea | The base of the beverage |
| Sugar | Food for the culture |
| Brewing Jar | Main fermentation container |
| Starter Liquid | Kickstarts safe fermentation |
| Cloth Cover | Allows airflow, blocks contaminants |
| Bottles | Stores and carbonates the kombucha |
| Flavoring Ingredients | Adds fun and variety |
| pH Strips | Monitors safety and readiness |
| Funnel | Makes bottling easier and cleaner |
Metal can damage your SCOBY or leach into the kombucha. Stick to glass, wood, or plastic tools.
Without it, your kombucha may not acidify fast enough, allowing bad bacteria to grow.
Only use pure black, green, or white tea. Oils in herbal teas can kill your SCOBY.
If you see mold (blue, green, or fuzzy white), discard everything and start fresh. It’s not safe to salvage.
Cost-effective: Brew for pennies per bottle.
Custom flavors: Mango-ginger, blueberry-mint, chai-spice—you name it!
Health benefits: Probiotics, antioxidants, and organic acids.
Eco-friendly: Reduce single-use plastic waste.
Creative outlet: Kombucha brewing is a fun, artistic process.
Brewing kombucha at home might sound intimidating at first, but with the right tools and a little patience, it becomes a deeply rewarding habit. The top 10 items listed here aren’t just suggestions—they're your gateway to successful, safe, and delicious brewing.
So grab your SCOBY, fill up your brewing jar, and start your fermentation adventure. Your gut—and your taste buds—will thank you.
When you're ready to show off your kombucha, don't forget to use and follow these hashtags:
#scoby #kombucha #fermentation #brewing #tea #sugar #brewingjar #starterliquid #clothcover #bottles #flavoring #pHstrips #funnel
Happy brewing! 🧡